Silk Painting and Shibori
![]()
![]()
![]()
![]()
![]()
![]()
![]()
![]()
![]()
![]()
![]()
![]()
When I began painting and dyeing silk, I experimented with stretched silk and
gutta. However, I soon tired of this form of silk painting as it seemed effectively
to be putting corsets on the dye to prevent it from behaving according to its nature.
It seemed to be more like paint-by-numbers. Not that there aren't silk-painting artists
who do wonderful work with the traditional serti work. It just wasn't for me.
I decided to explore what could be done by allowing the dyes to act naturally and
then exploit that: I began experimenting what I call Migration Technique, at first on
stretched silk, then by shibori-related methods.
When dye is applied to silk, it begins to wick through the silk fibres till all the excess
liquid (that which cannot yet be taken up by the silk) is absorbed. The movement of
the dye as it disperses is called migration. The point when it no longer spreads is called
dispersal. At this point, the sheen of wetness goes off the surface of the silk. The dye is
still moist, but the silk is not saturated. When an applied medium-to-dark colour reaches
this point, and you apply a lighter colour to the middle of this area (in a controlled
manner), the dyes do not mix.
Instead, the new colour displaces the darker colour as it (the new colour) migrates. There
might be some minor degree of mixing, but most of the first colour will travel ahead of the
new colour as it migrates outward. In effect, the new colour pushes the first colour outwards.
The painted area expands. This process is displacement. It is clearly visible as it happens.
It is easier to control this migration, dispersal, displacement process in stretched work,
as the silk is taut and there are no other factors (like contact with another surface) to distort
the process. However, it still occurs when the silk is not stretched. Its effects are just more
unpredictable.
1.
 2.
2.
 3.
3.
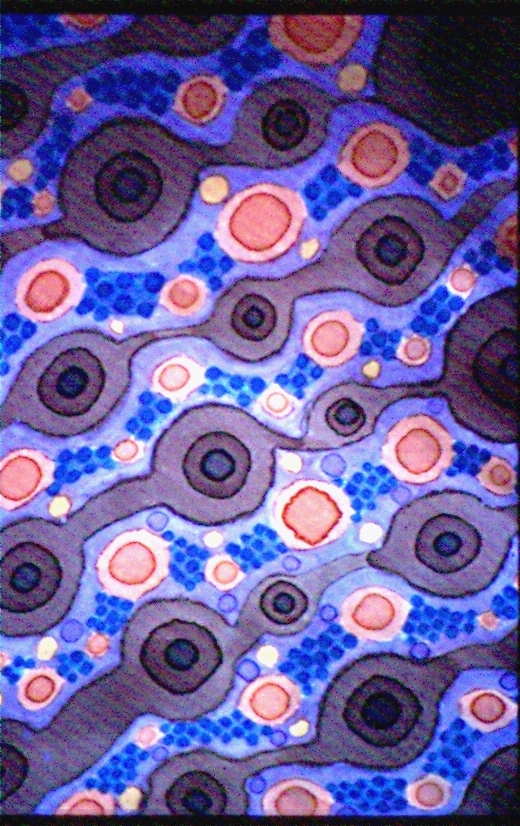
These are exercises in Migration Technique (stretched work). 1 is a detail from a scarf-sized piece. Soft-edged shapes are
wet-into-wet. Hard-edged shapes are wet-into-dry. 2 and 3 are Macro-Migration Technique exercises, This exercise
demonstrates how the different migrating pools of dye, applied in a regular pattern, spread out and tend to distort rather than
merge when they meet.
The effect will be symmetrical if the same quantity of dye is applied for each "pool" of the same colour. In 2 and 3, I had great
fun turning them into bunches of flowers with machine embroidery.
When I began, I took no classes (there were none to take in Cairns) and had no
book; only a duplicated sheet about using salt. This stated that the salt, applied
after the dye, "attracted the dye" and made interesting patterns. Salt was, it said,
"best used with discretion". That was it - no reasons or explanations. What an
irritatingly unsupported, bald statement.
I therefore decided to use salt - in all its grades other than large rock salt - with
a complete lack of "discretion". I spent 15 months doing it.
The first, most obvious and easily demonstrable discovery was that, far from
attracting the dye, the salt repelled it (apart from liquid trapped under grains or
lumps if the fabric was saturated).
That discovery determined my line of research.
4.
 5.
5.  6.
6.

7.
 8.
8.
 9.
9.
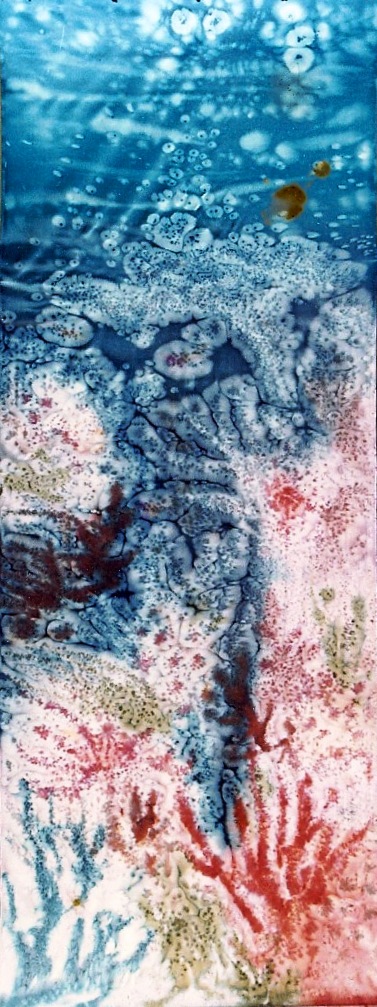
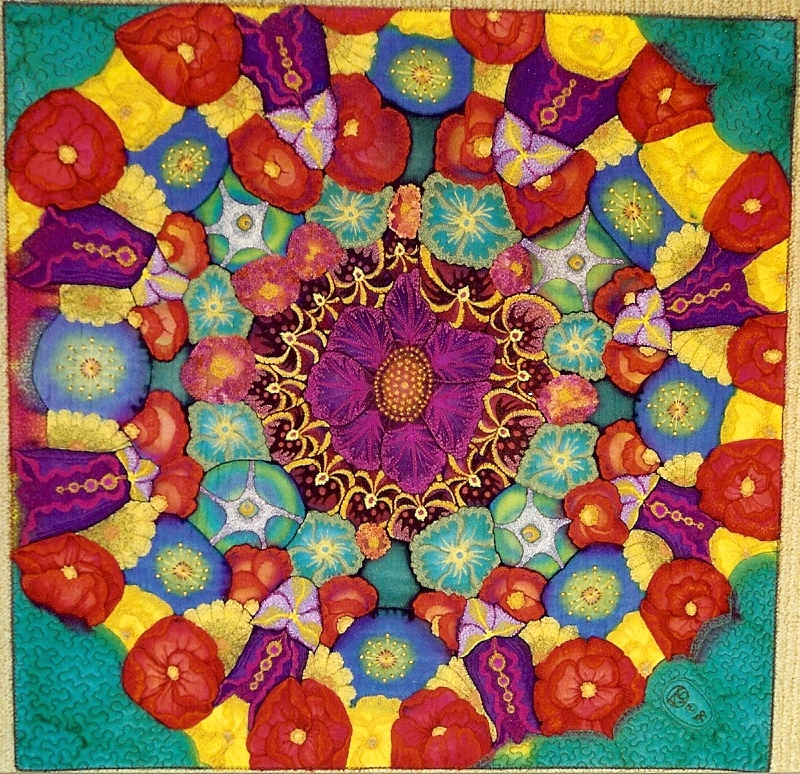
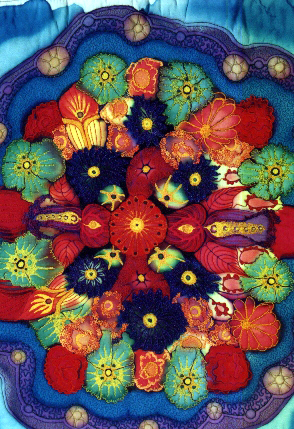
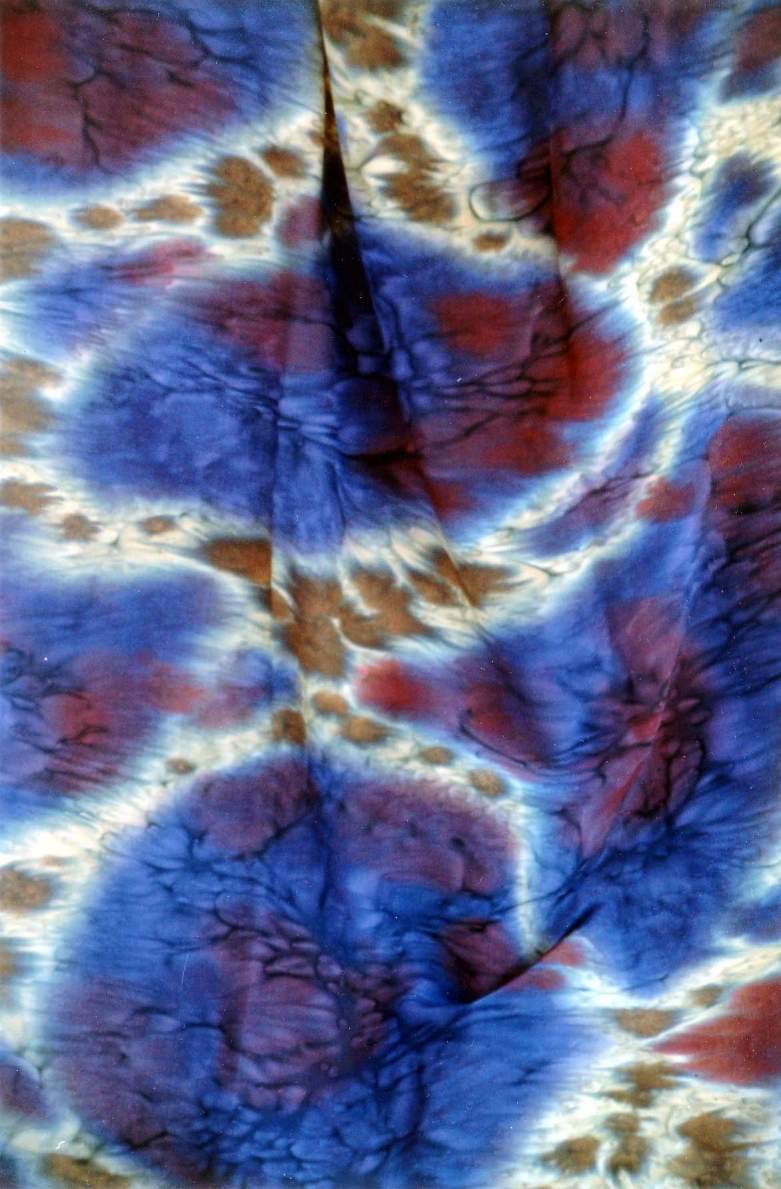
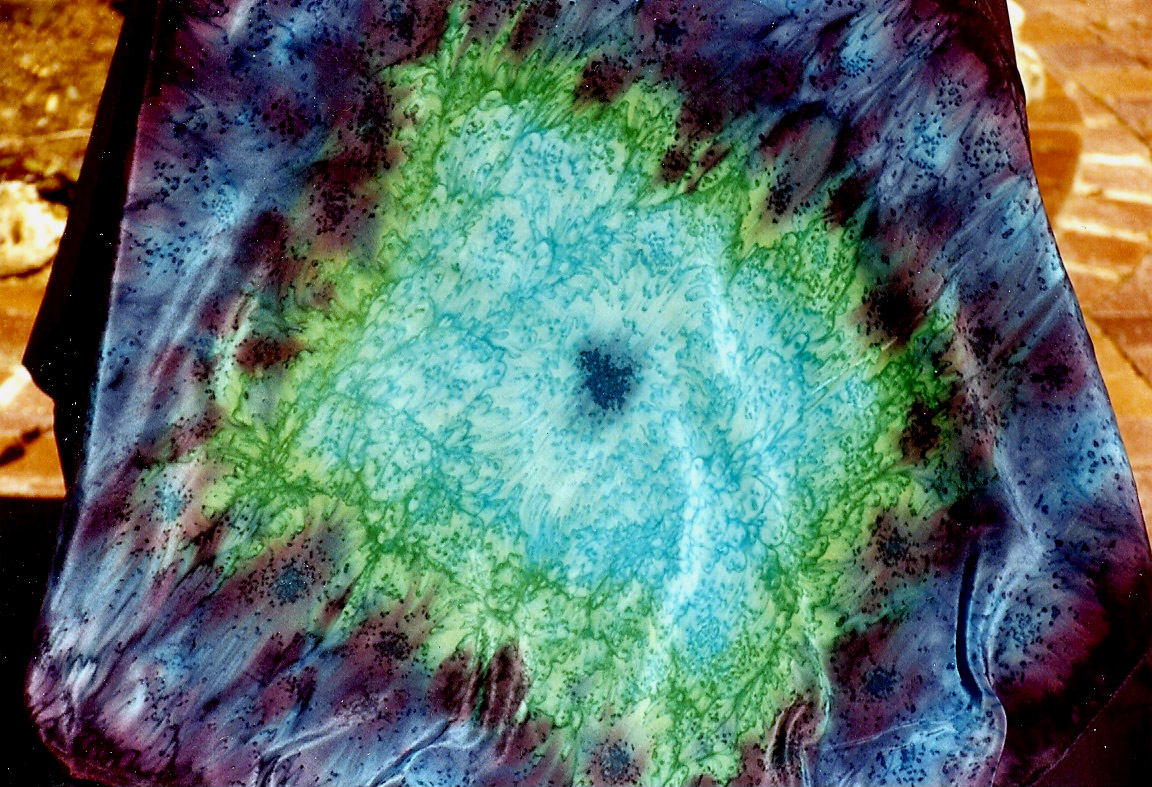
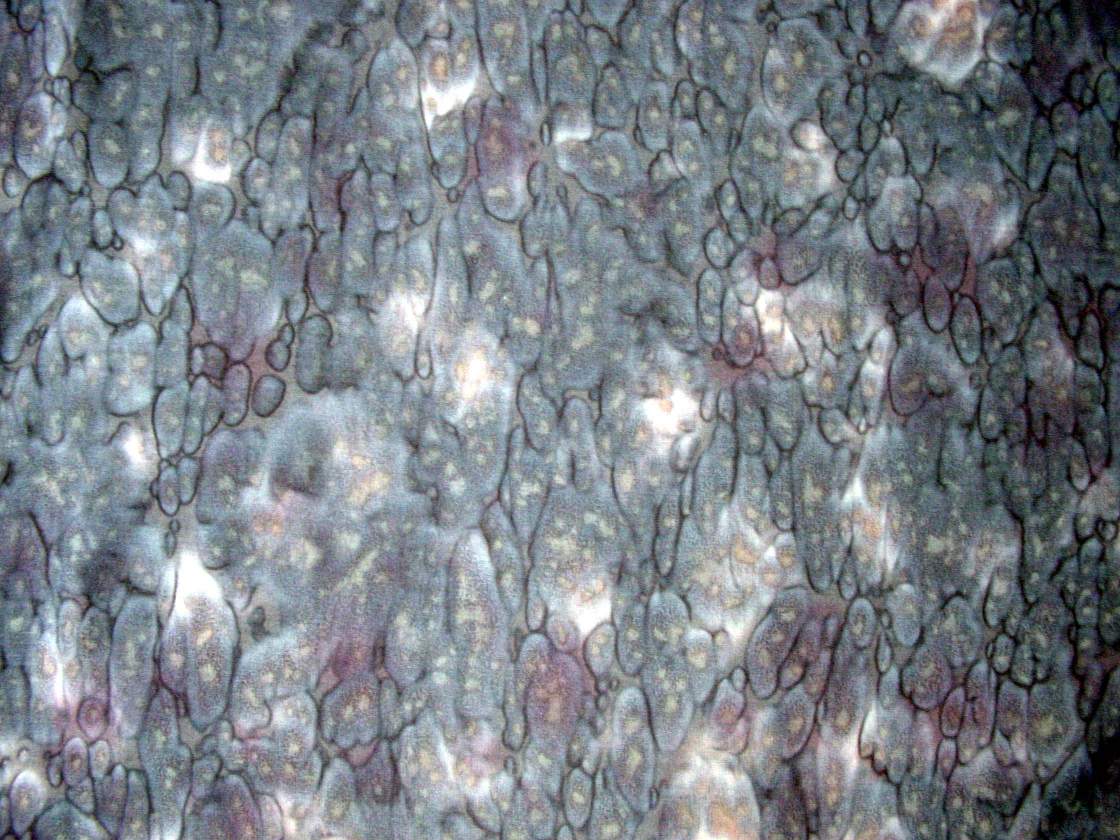
The above are all examples of salt technique (stretched work). 8 is on crêpe de Chine, the others on
habotai. To escape from the "pretty picture" syndrome, I often used the patterns - though not the colours -
of coloured marble as inspiration. The last is an underwater reef scene using coloured salt.
There was, it turned out, a grain of truth (though no more) in the call for
discretion. As stated above, the salt repels the dye, which travels across the
stretched silk. It is therefore necessary to leave some space for the dye to move
through and into.
The fun is in exploring how to use the salt in all its grades to make the dye
move in different ways and to different effects.
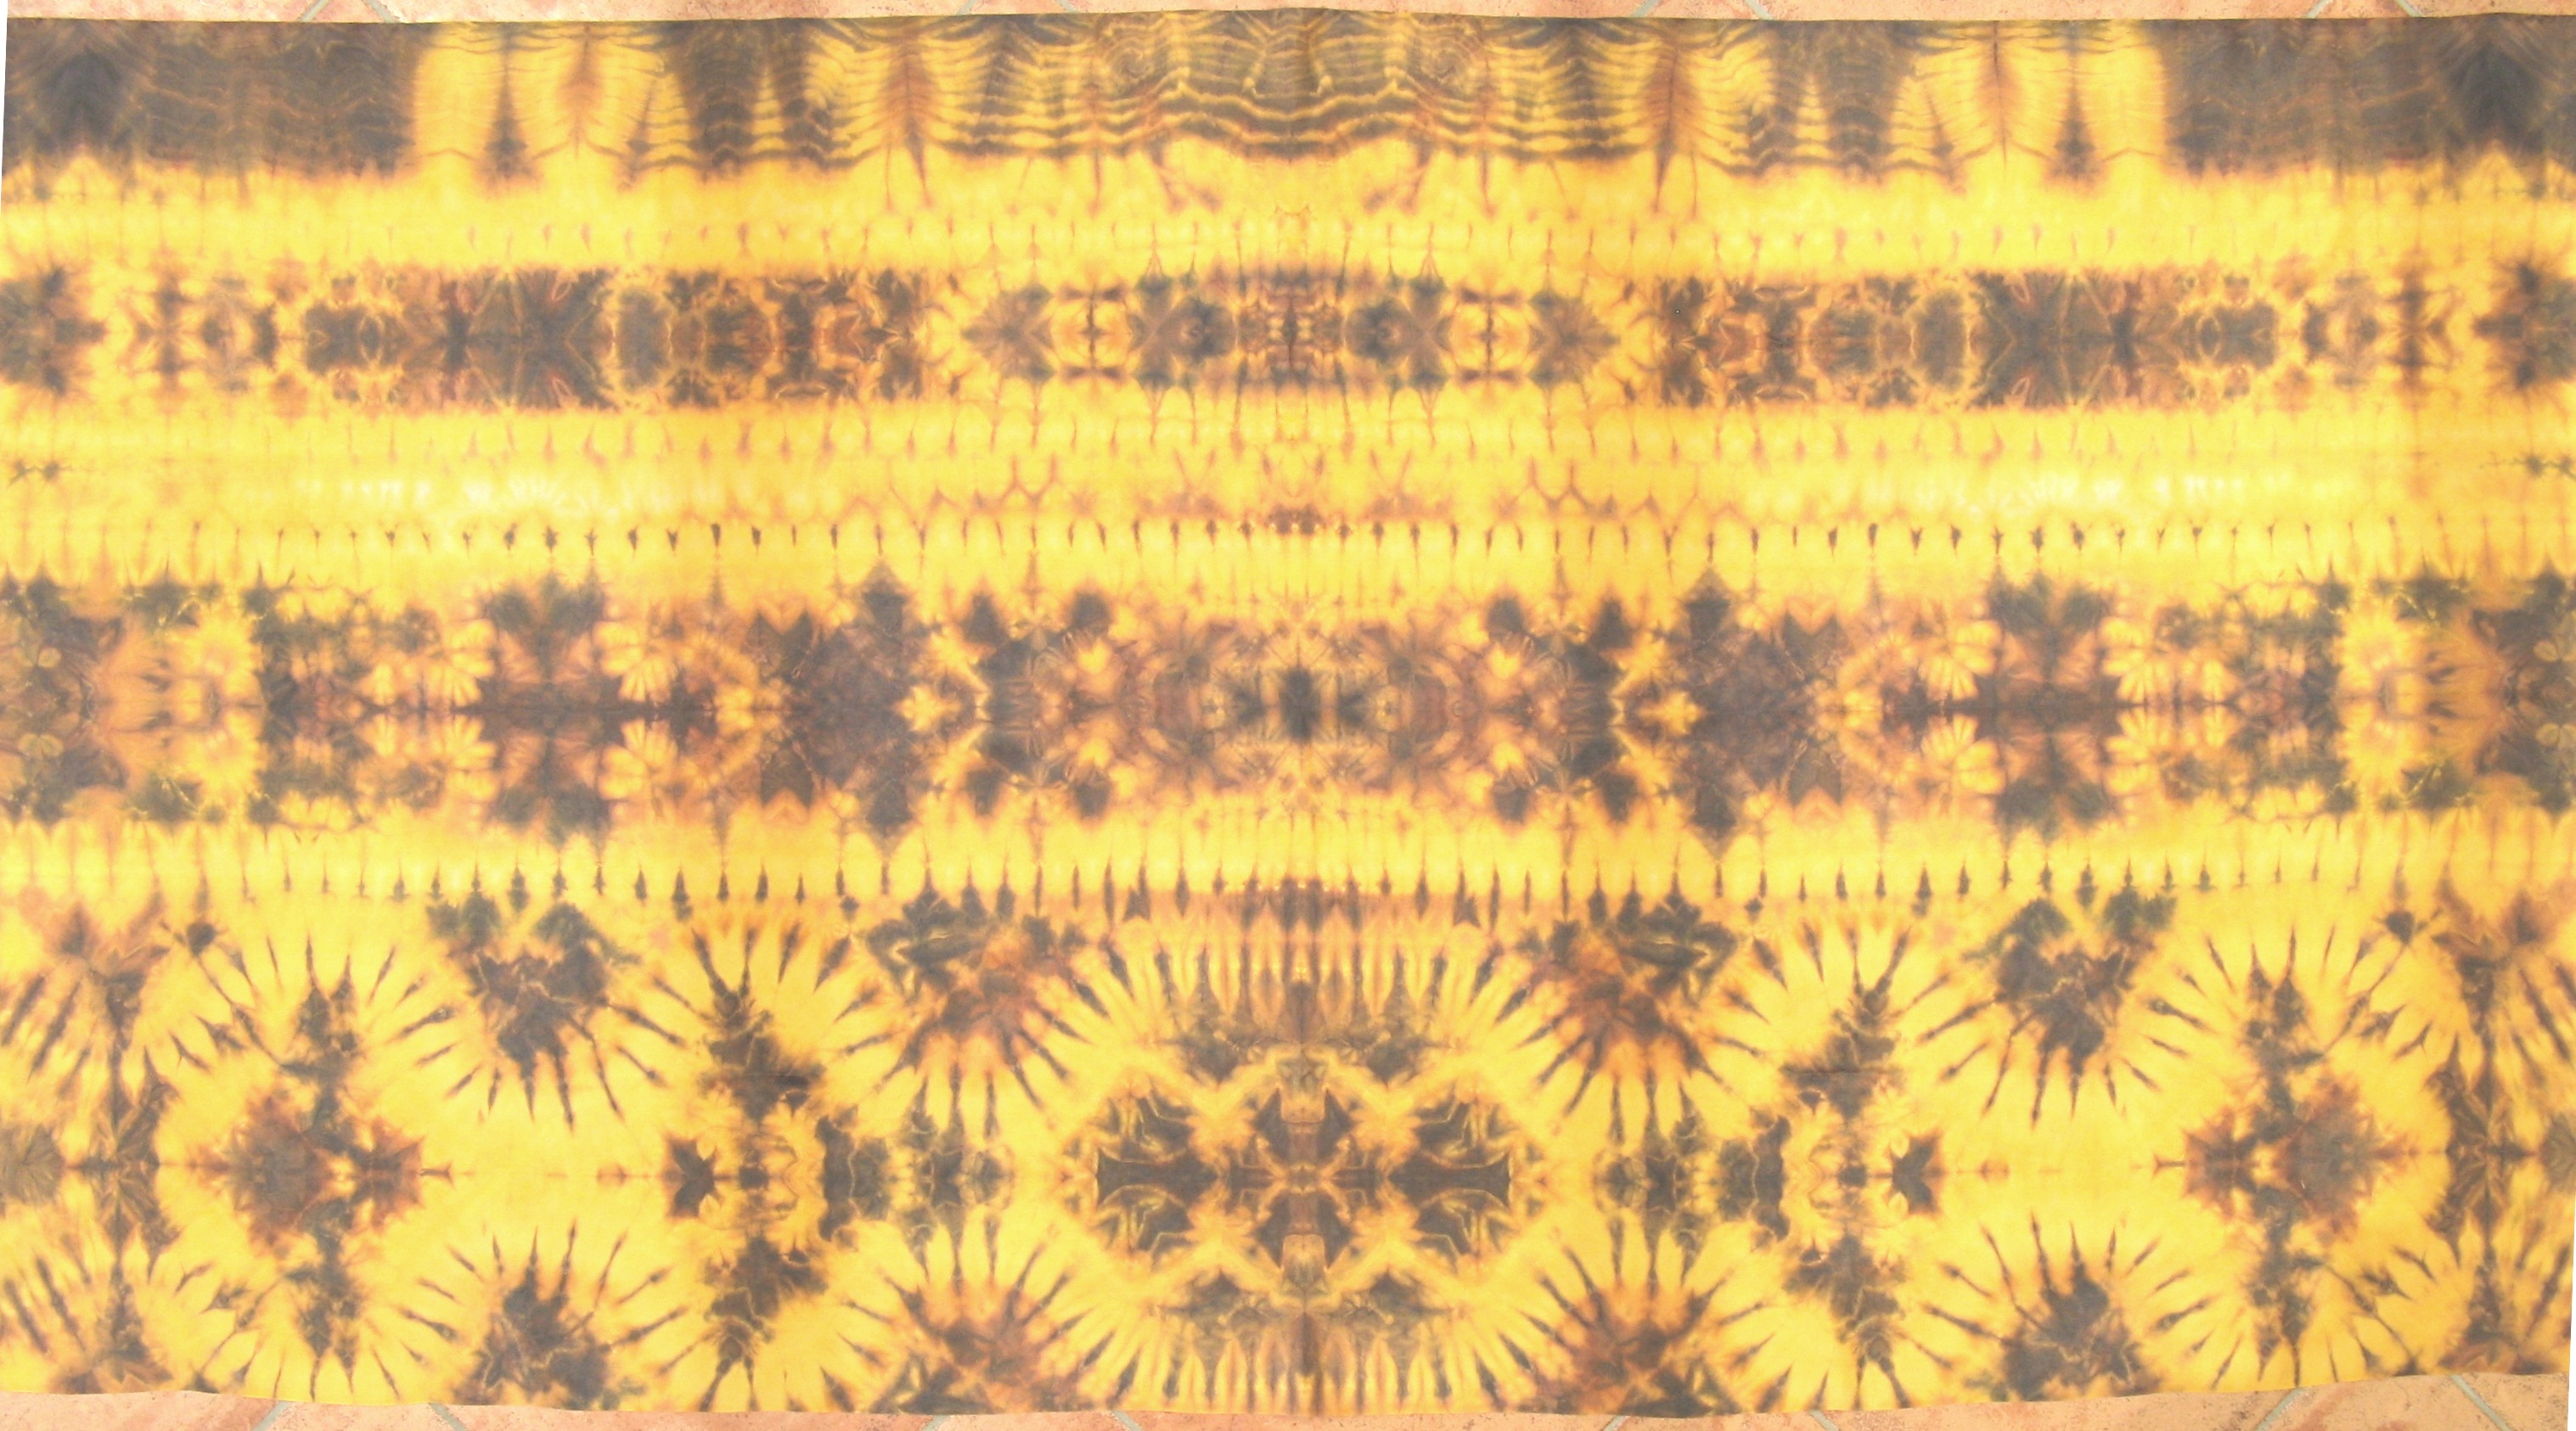
Aussie Shibori
10.
 11.
11.
 12.
12.
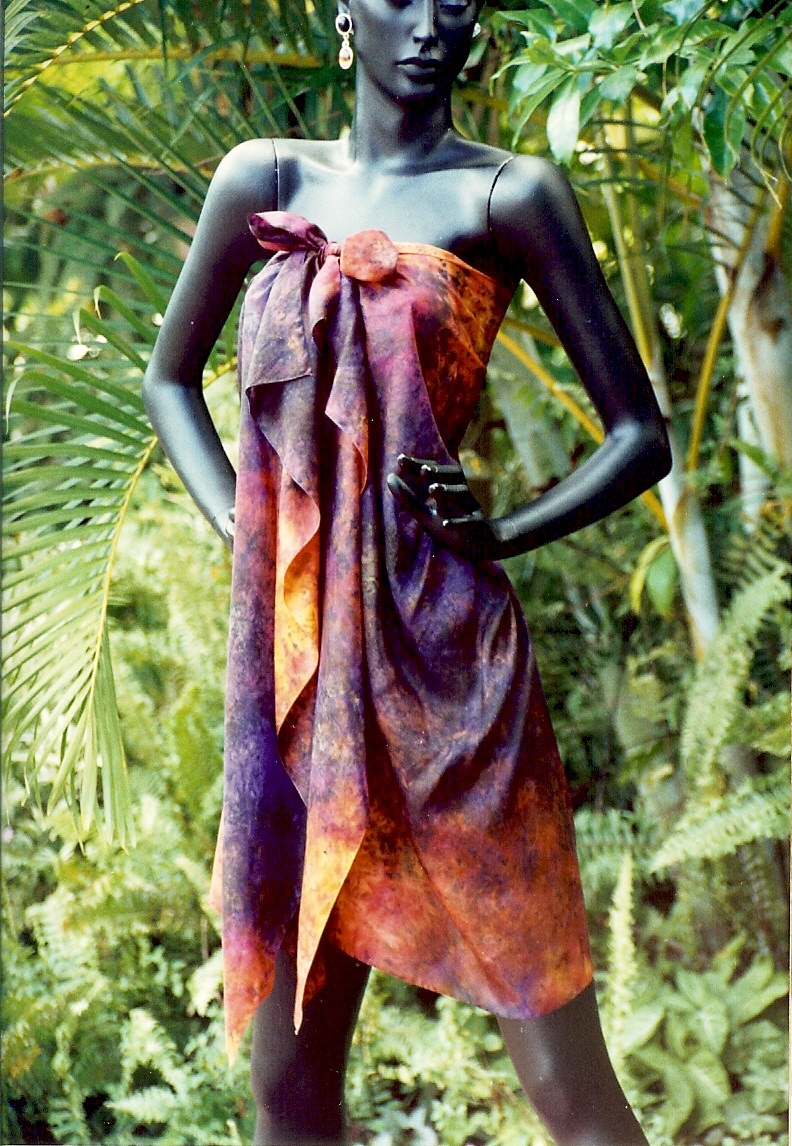
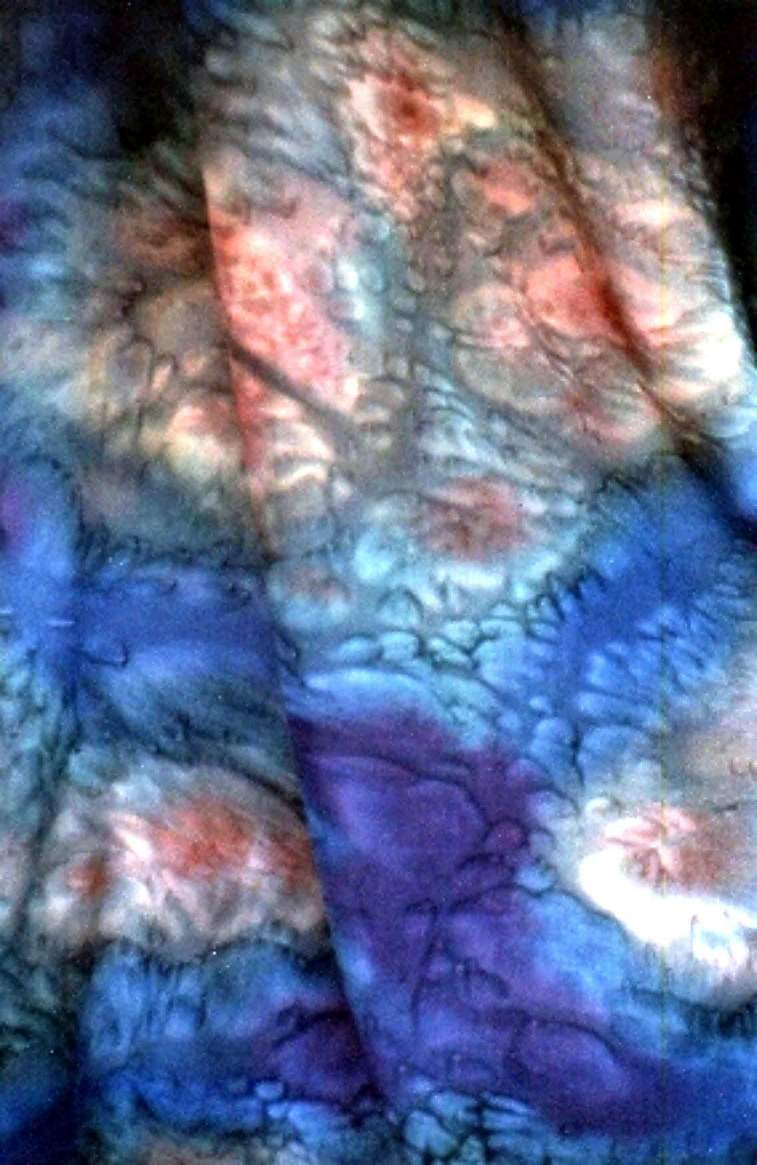
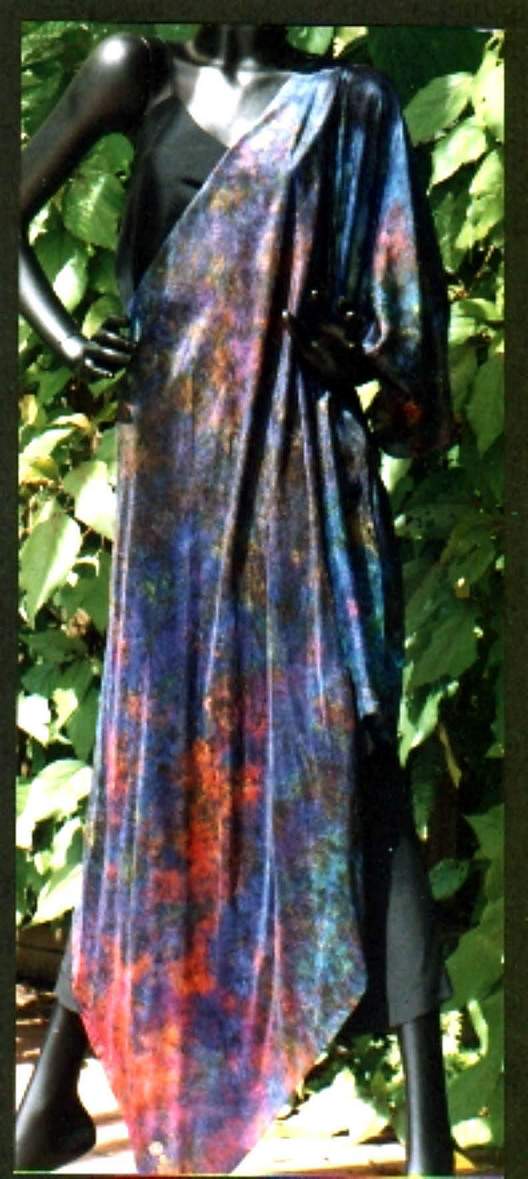
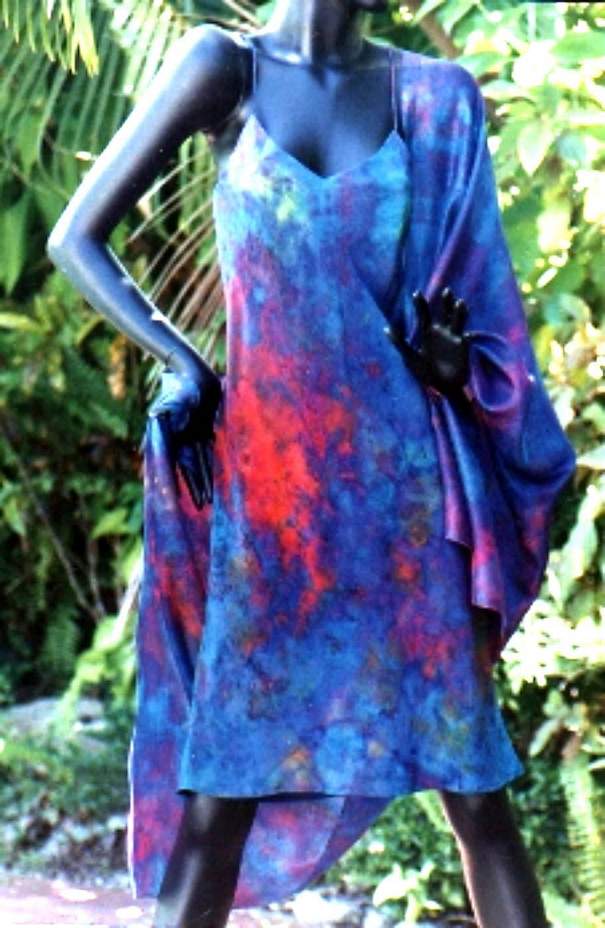
A sarong (in habotai), a camisole dress (in crêpe de Chine) and shawl/sarong (habotai) and another sarong (also
habotai) in one of my informal, shibori-related techniques. Why treat shibori together with silk "painting"? Because,
with Aussie shibori the dye is applied to the manipulated (shaped) silk not by immersion, but by hand.
13.
 14.
14.
 15.
15.
16.
 17.
17.
 18.
18.
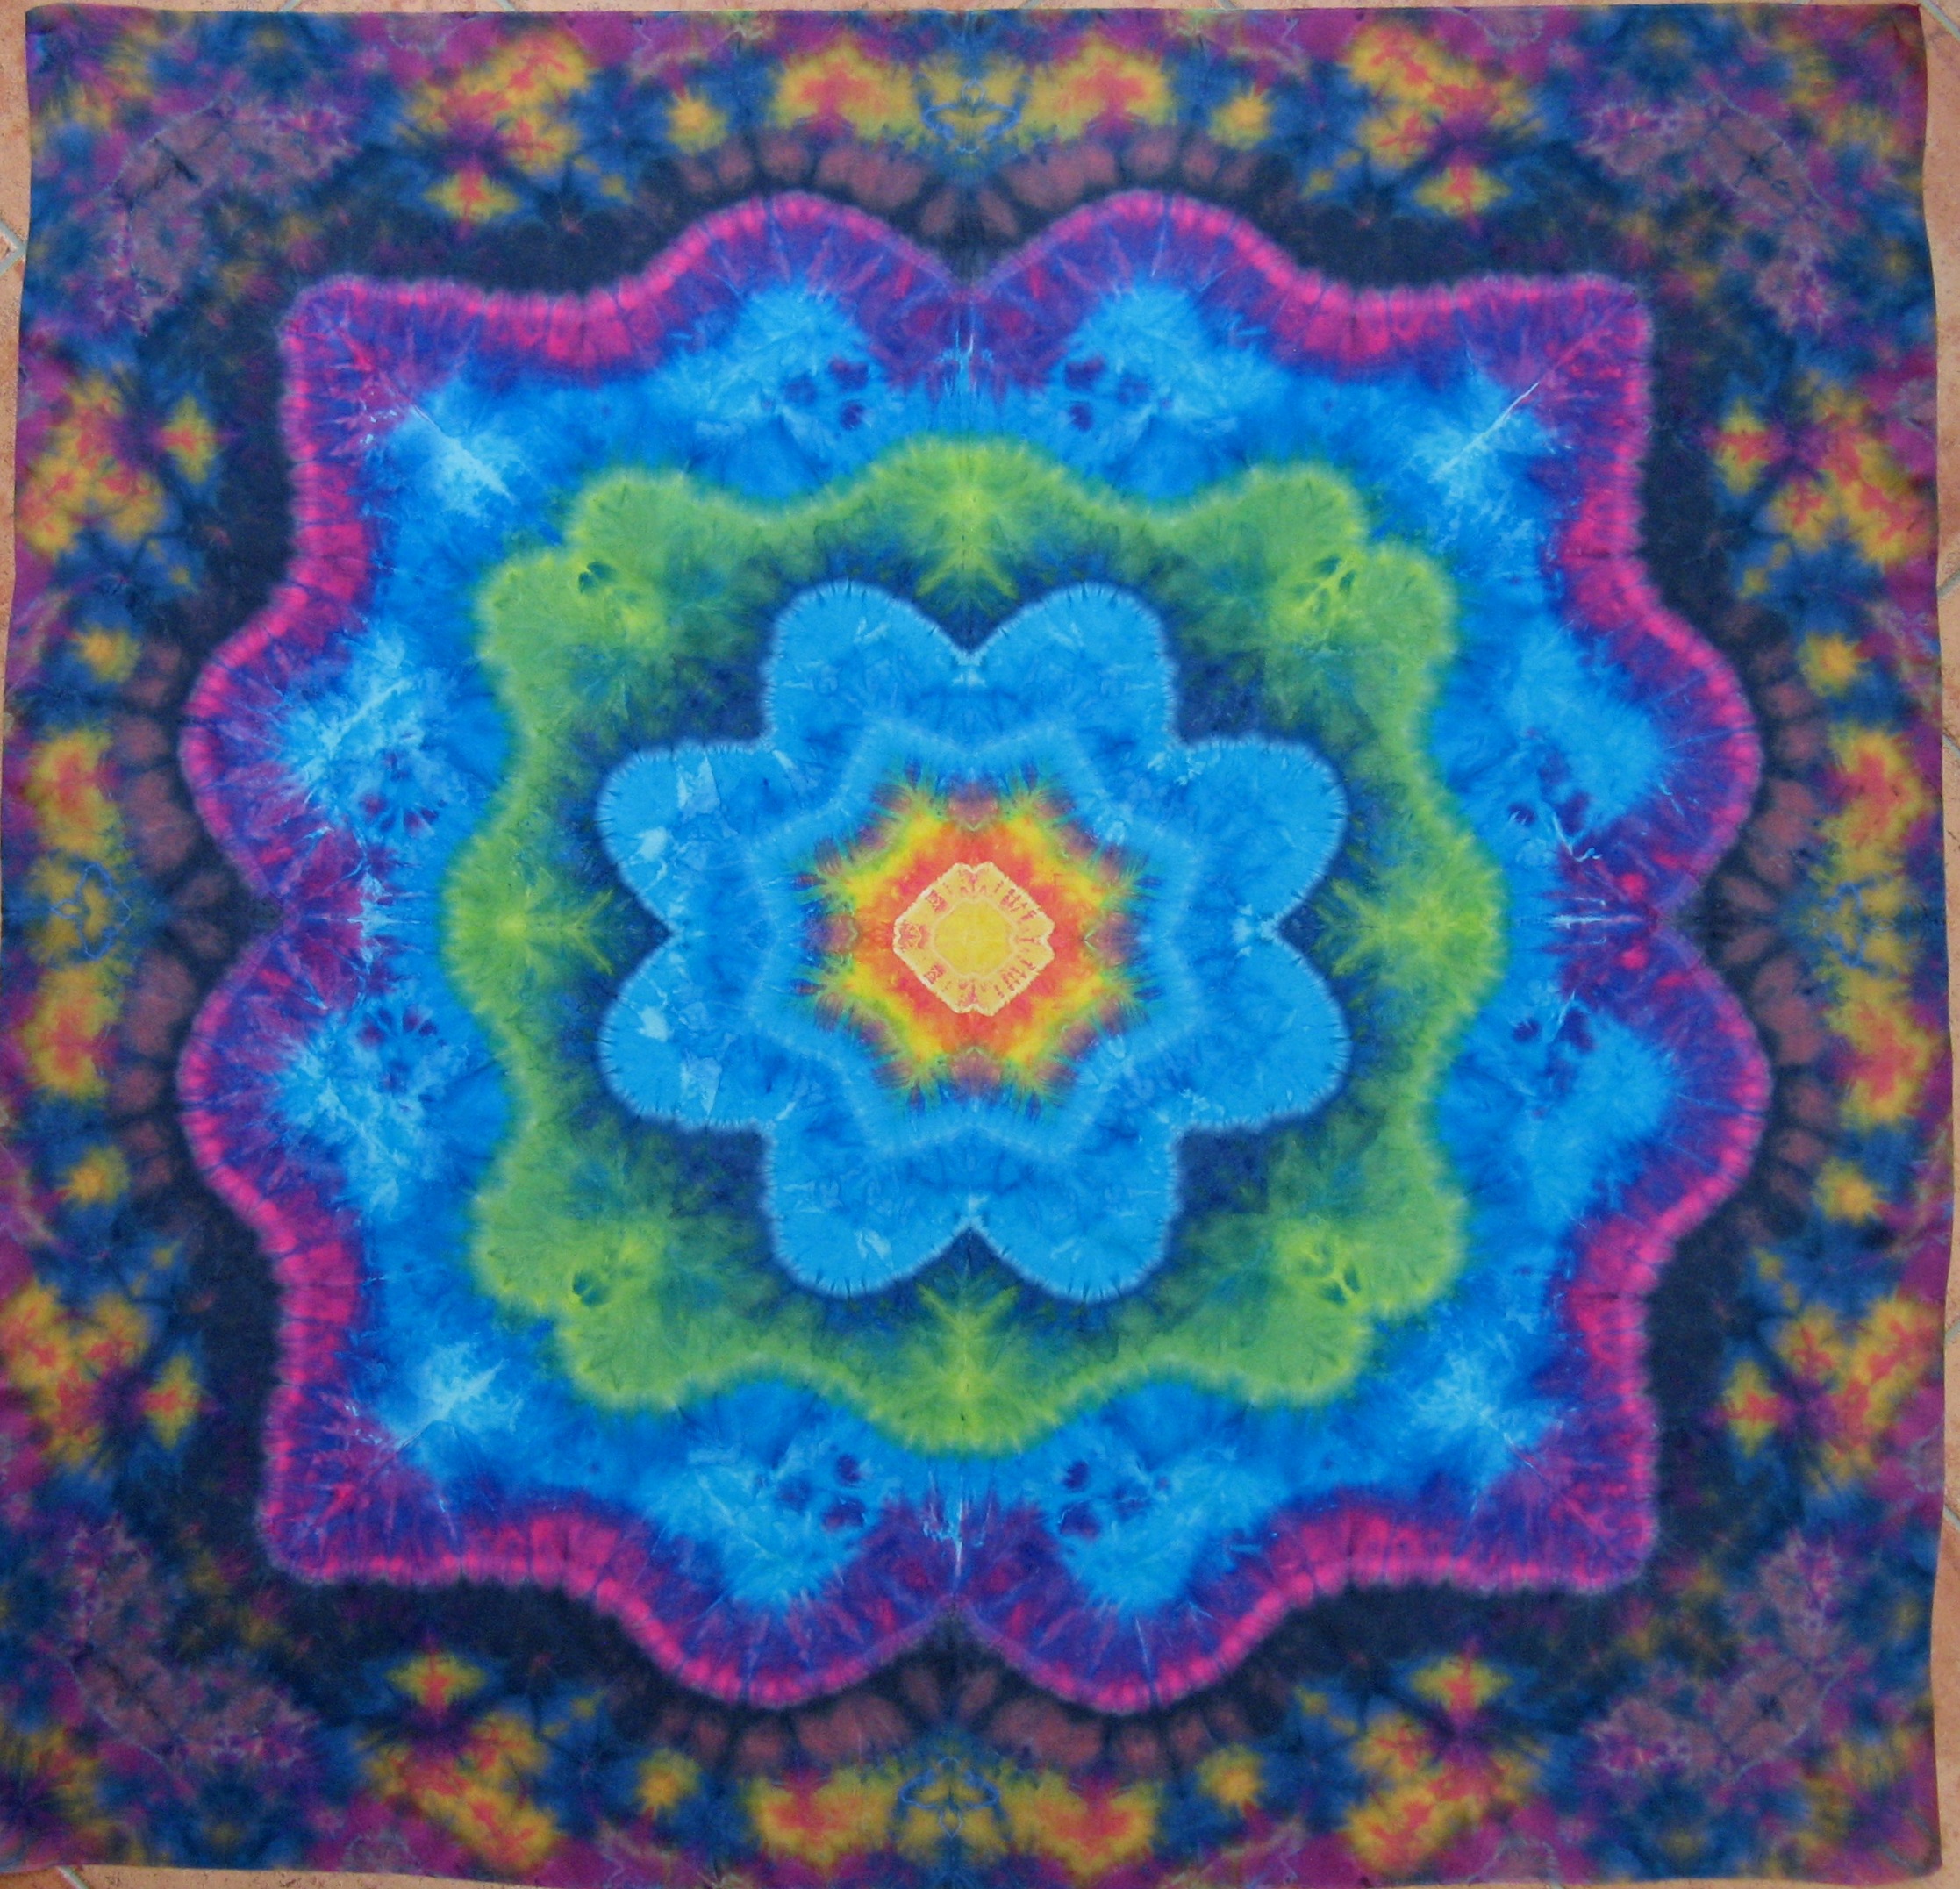
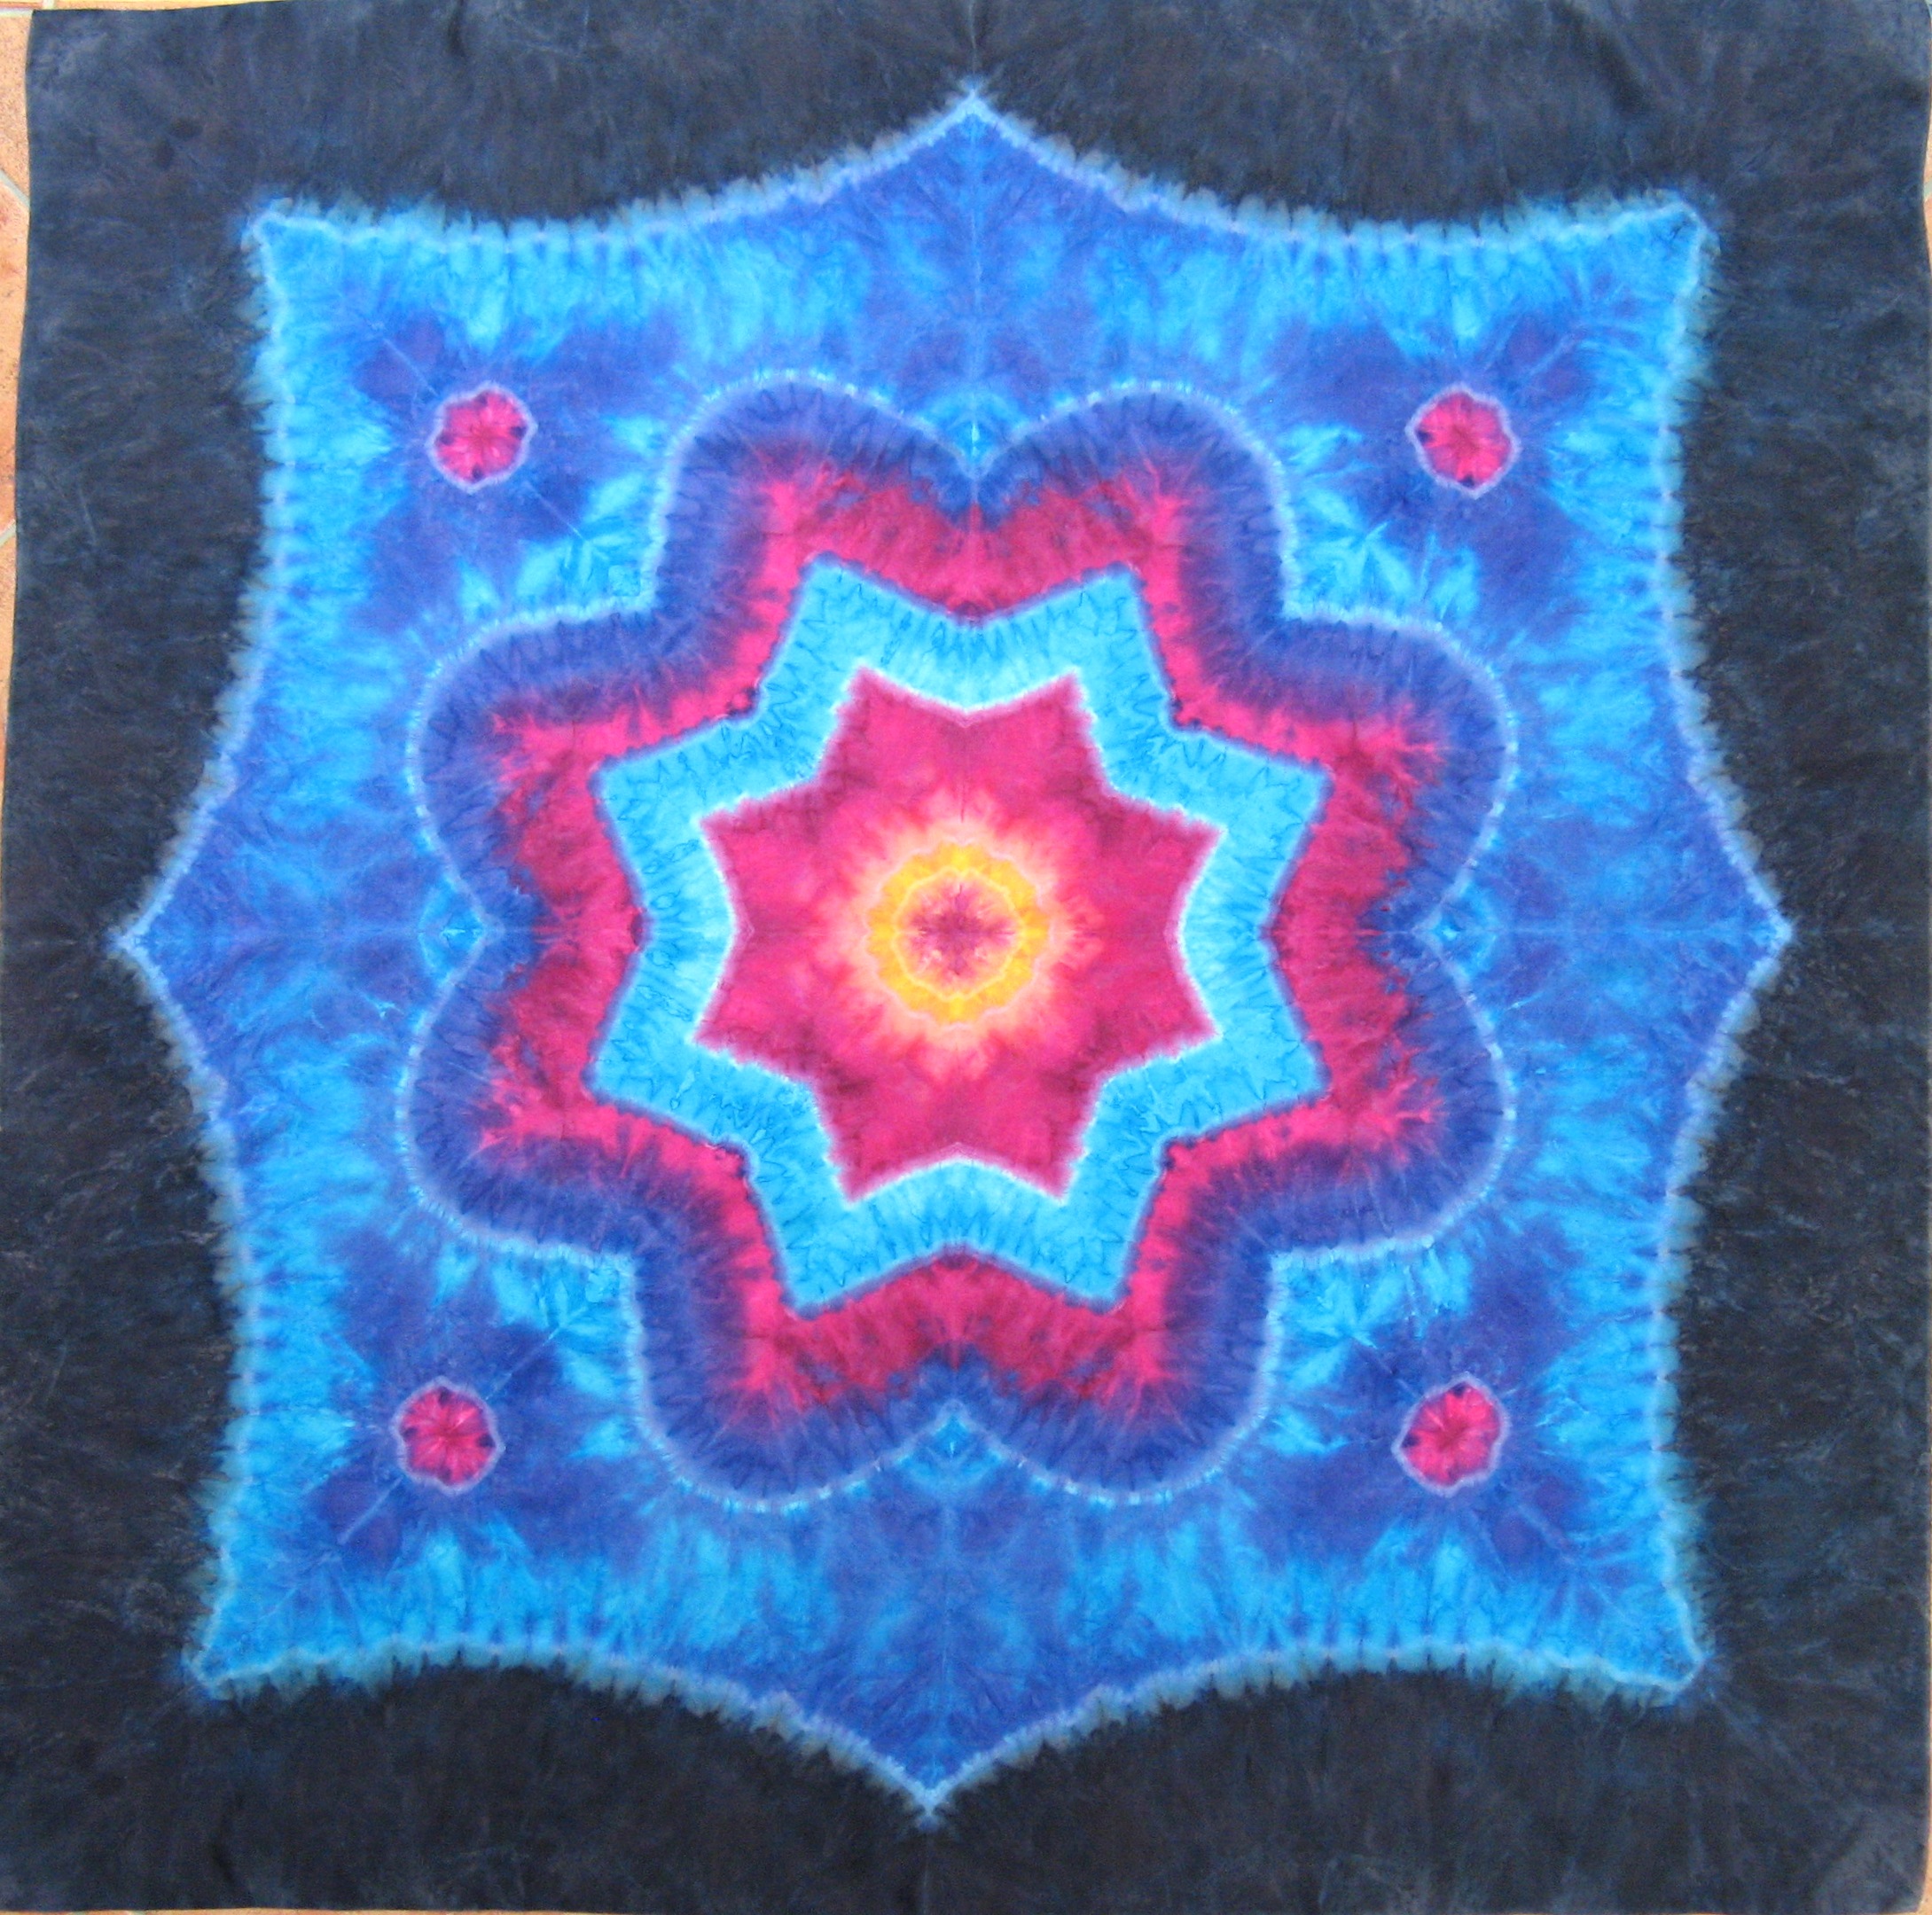
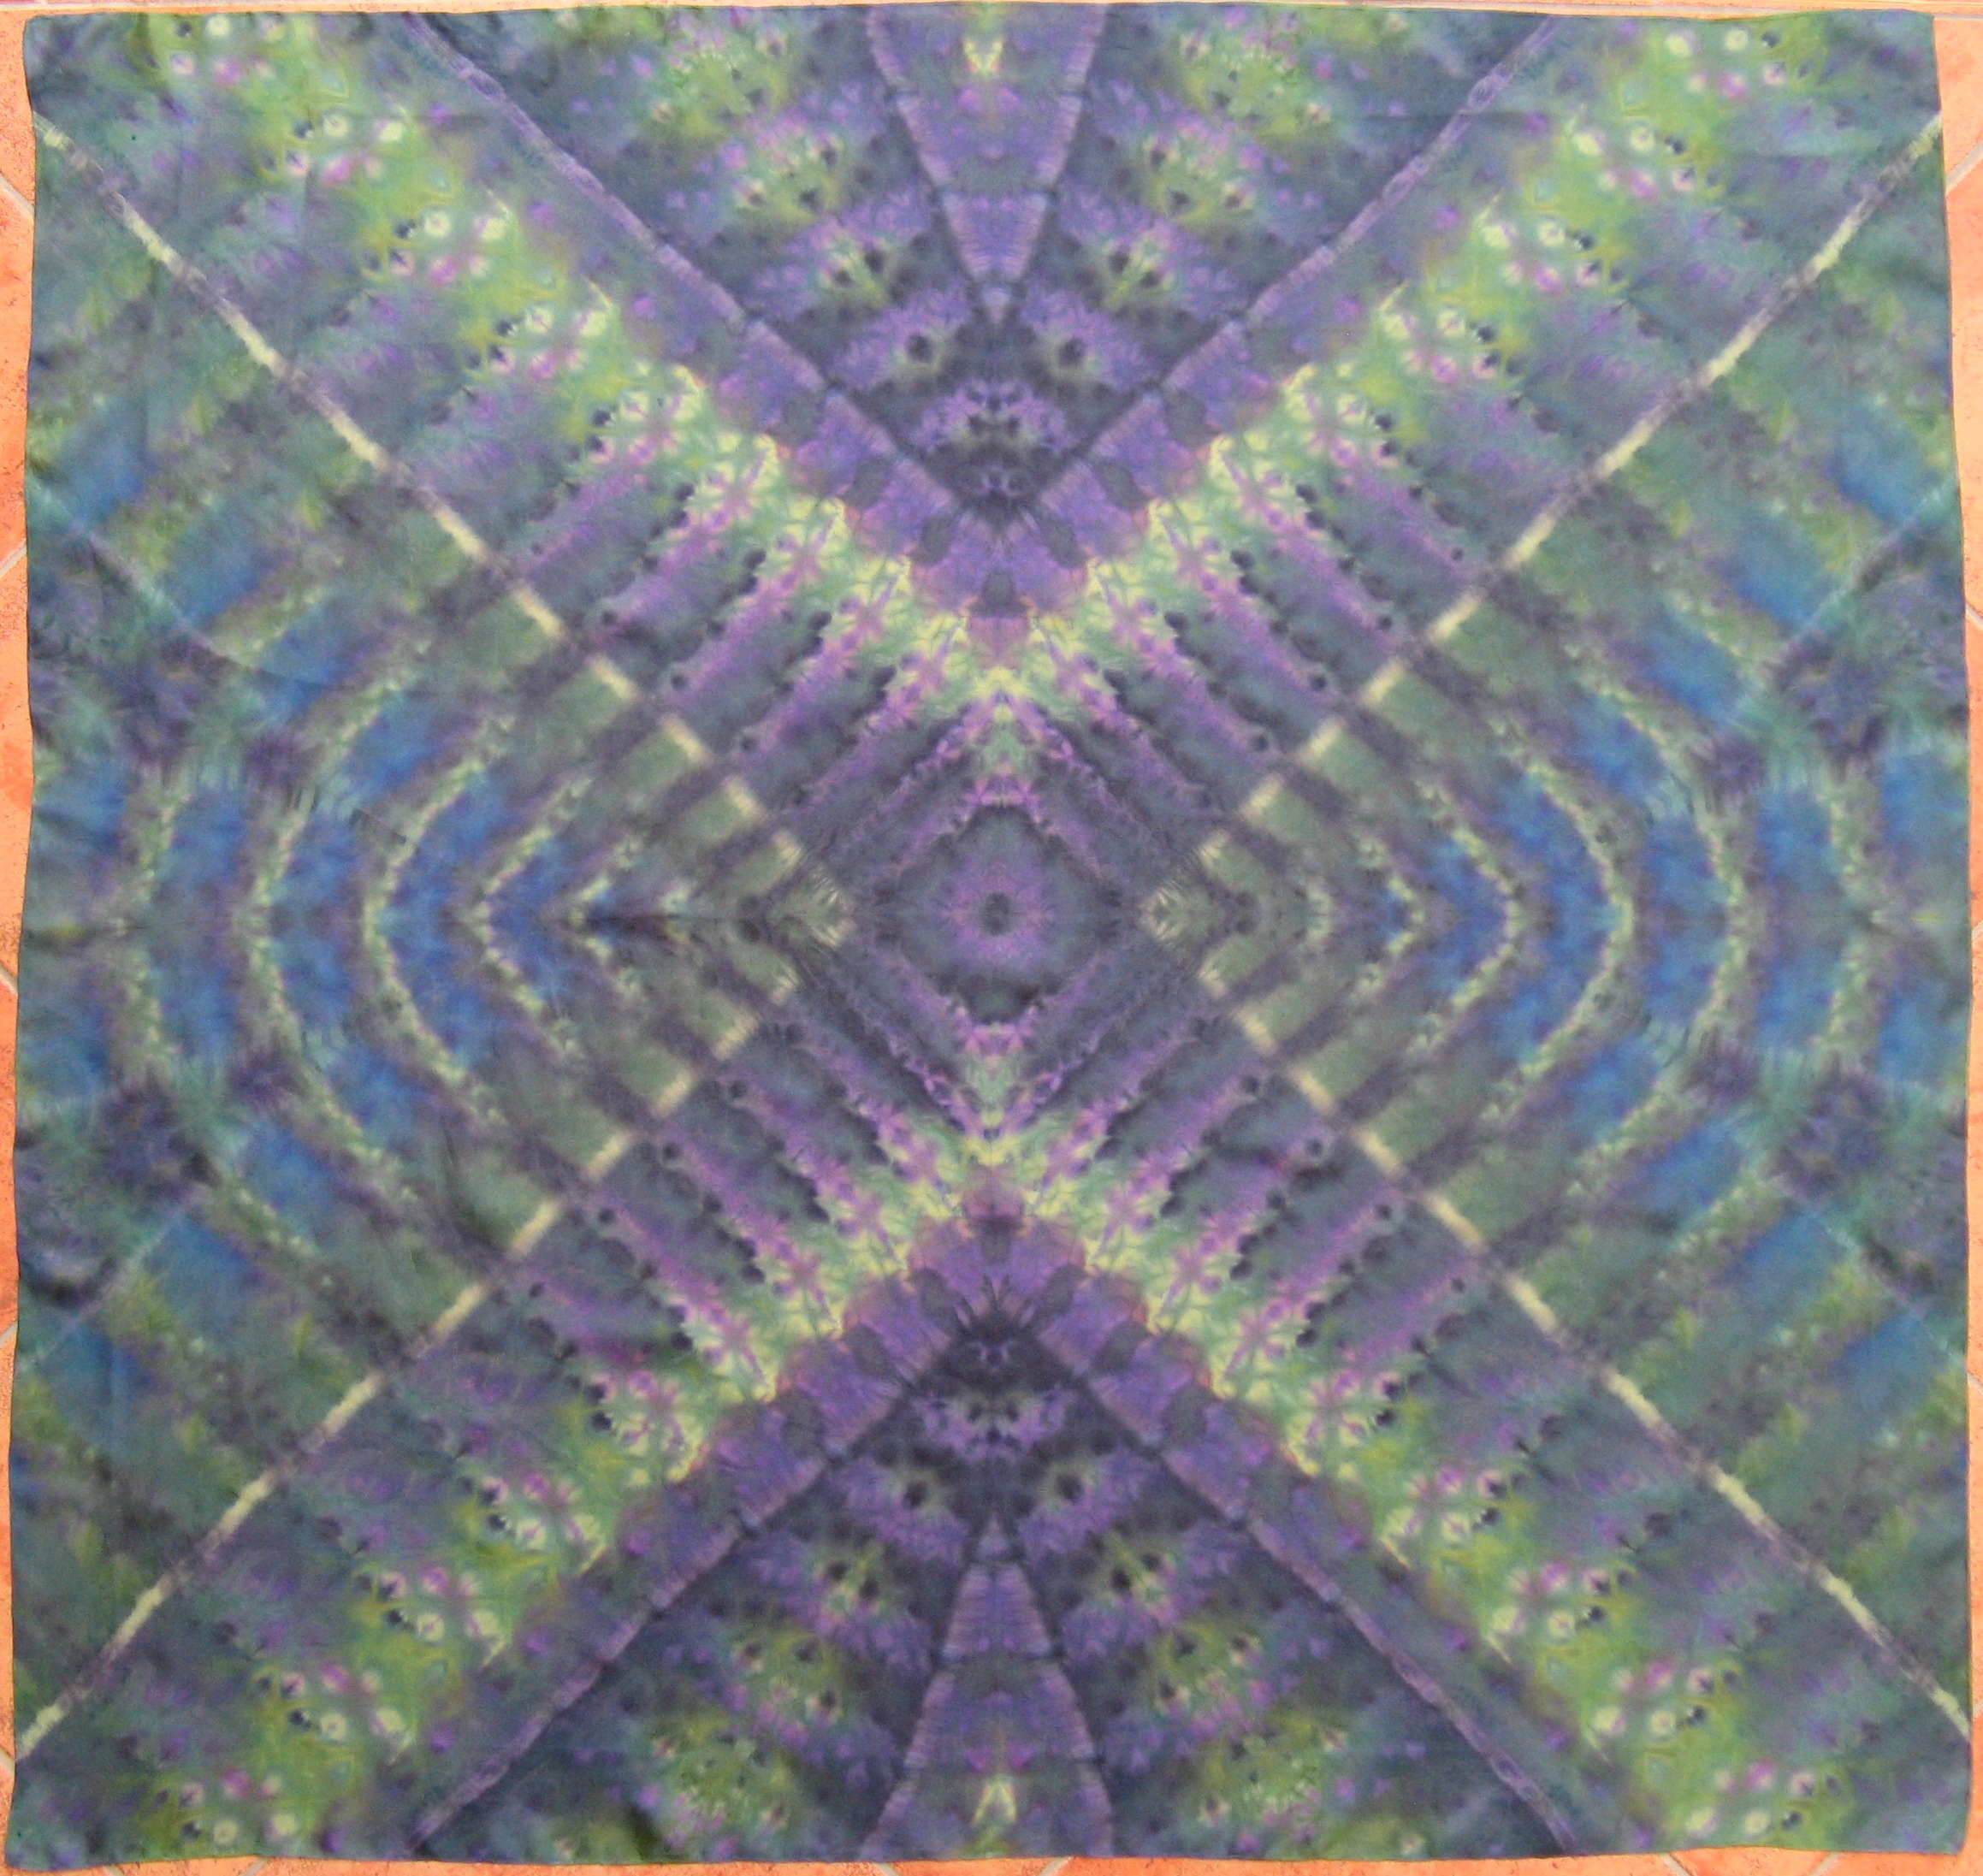
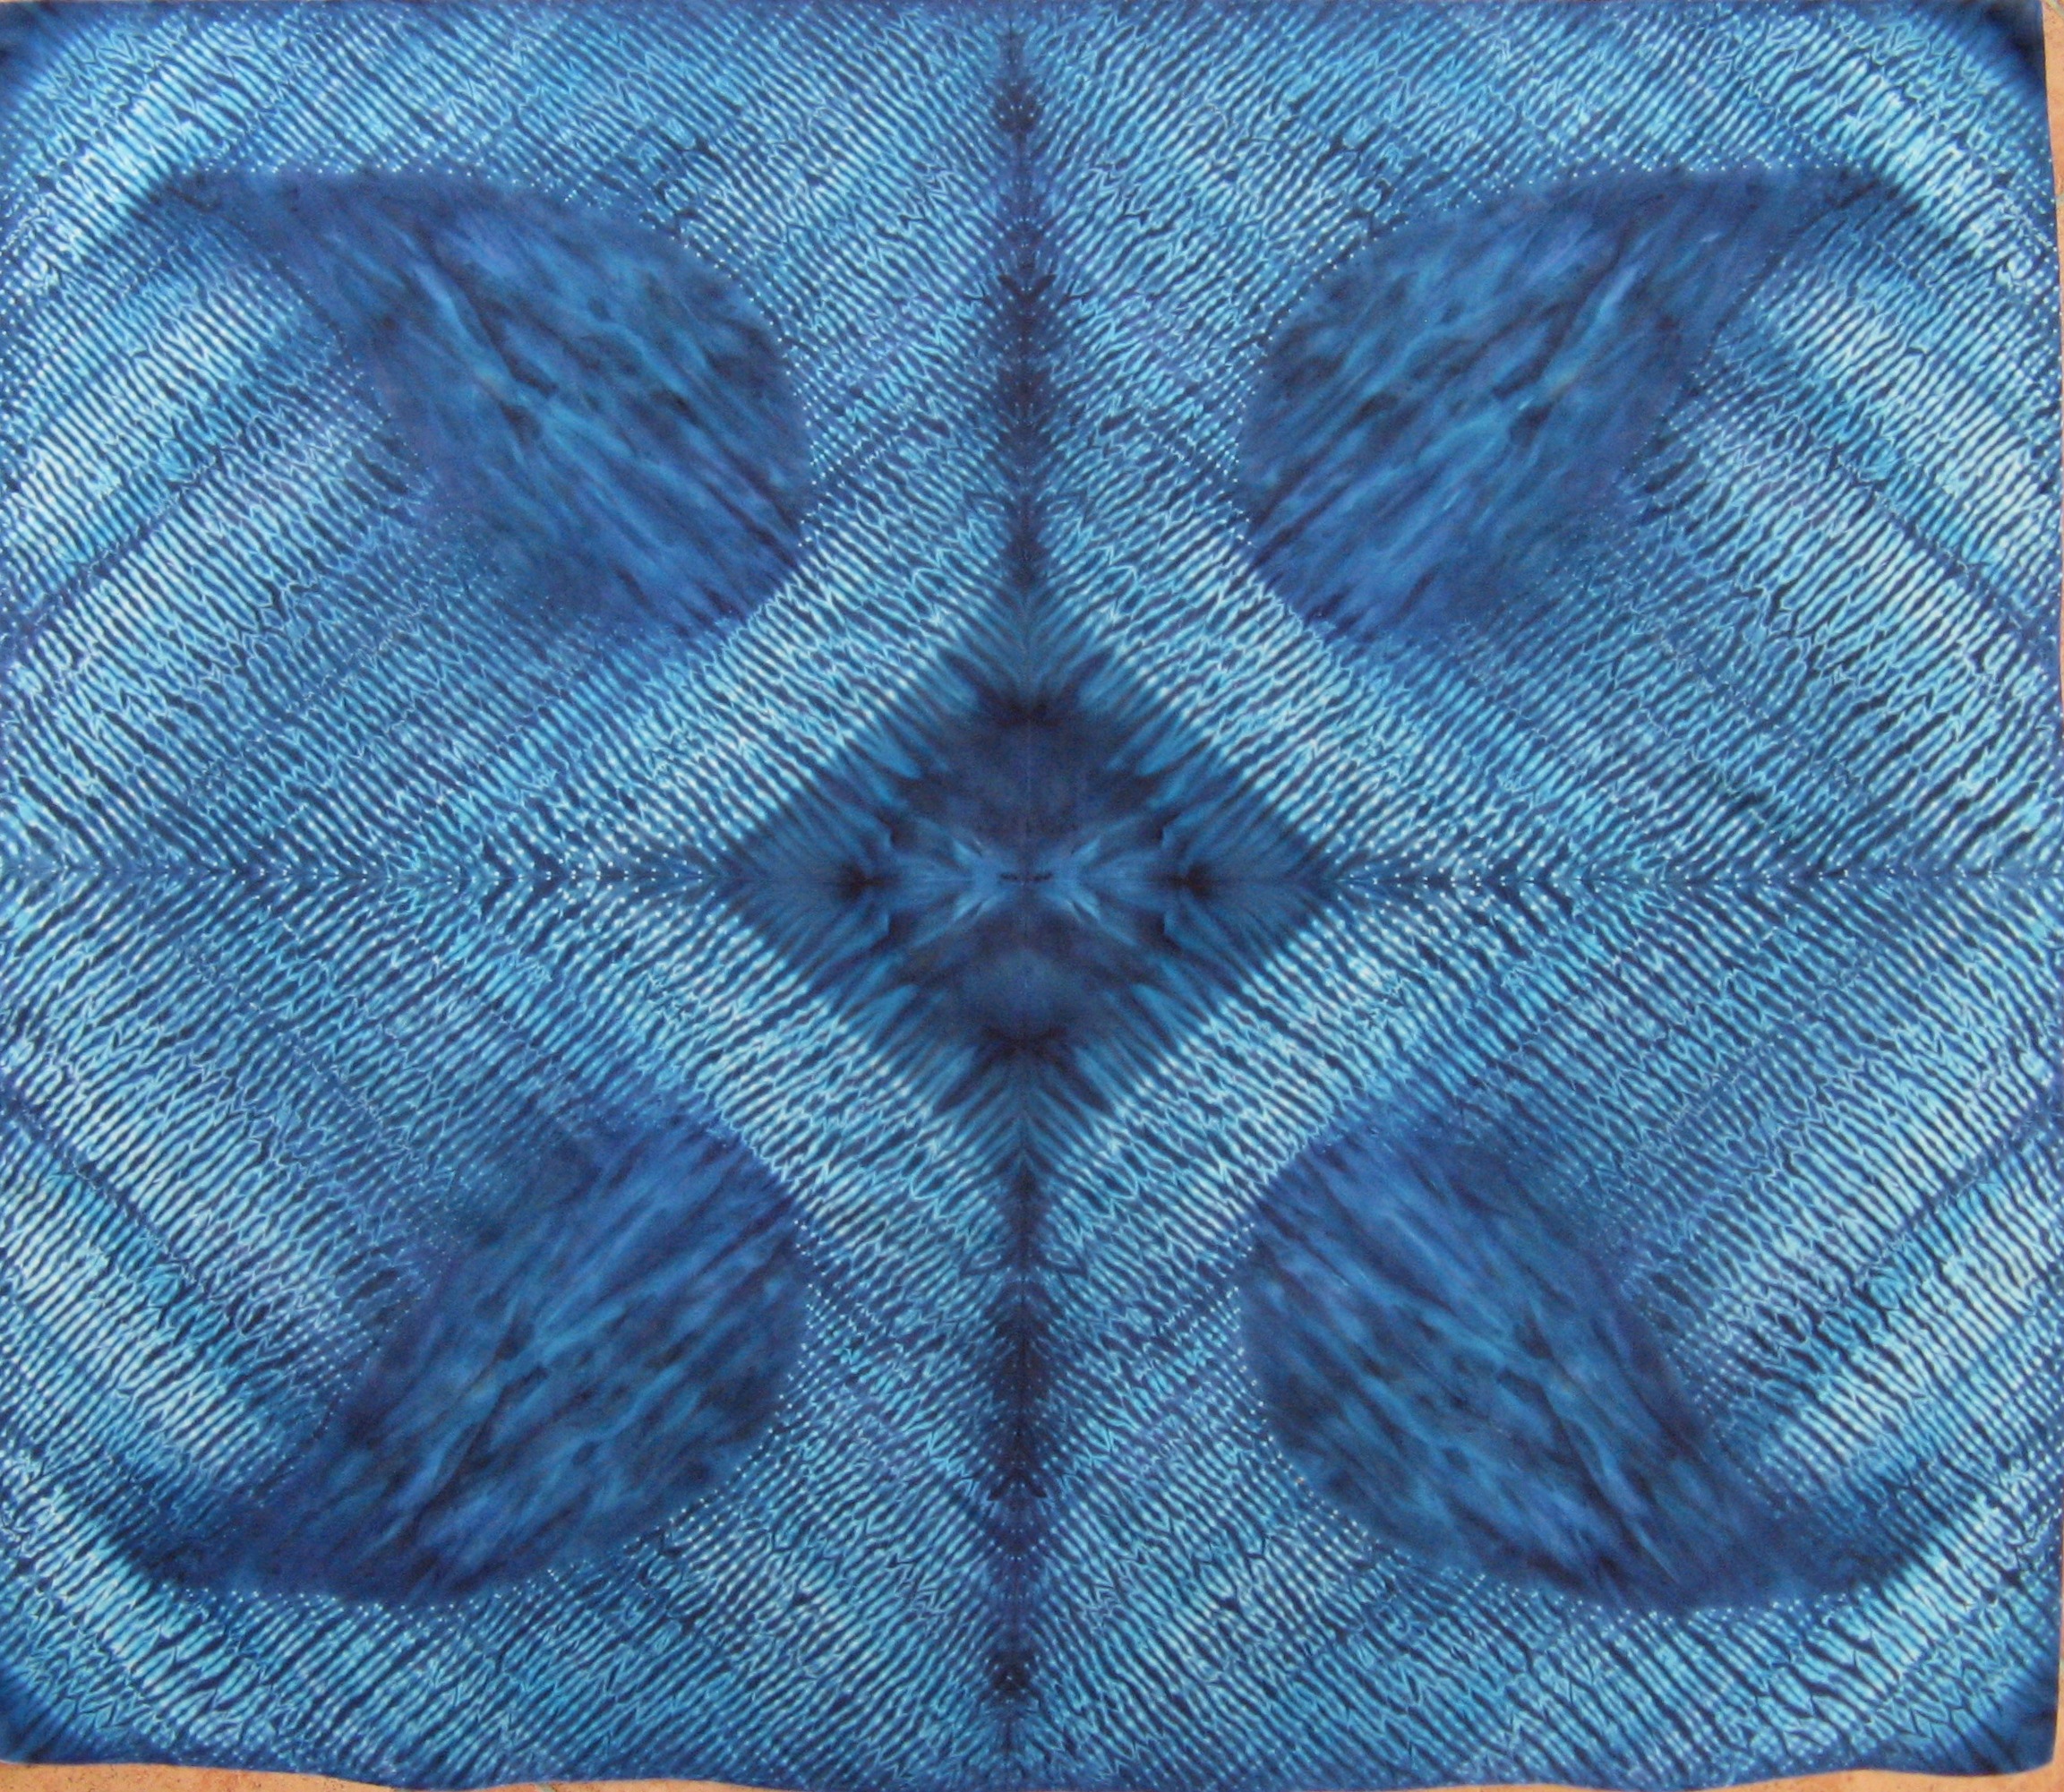
My Aussie shibori technique, Rose-window variation: six examples of 45" x 45" (114 cm x 114 cm) scarf pieces.
Here, it has been combined with salt technique, but, because of the setting method (microwave*), the effect is
different from that on stretched work. You can see the effect by enlarging the images. It's that paler speckling and
those darker-edged shapes.
And, because the fabric is folded in preparing for the application of the dye, mirror-image salt effects are
guaranteed!
19.
 20.
20.
 21.
21.

22.
 23.
23.
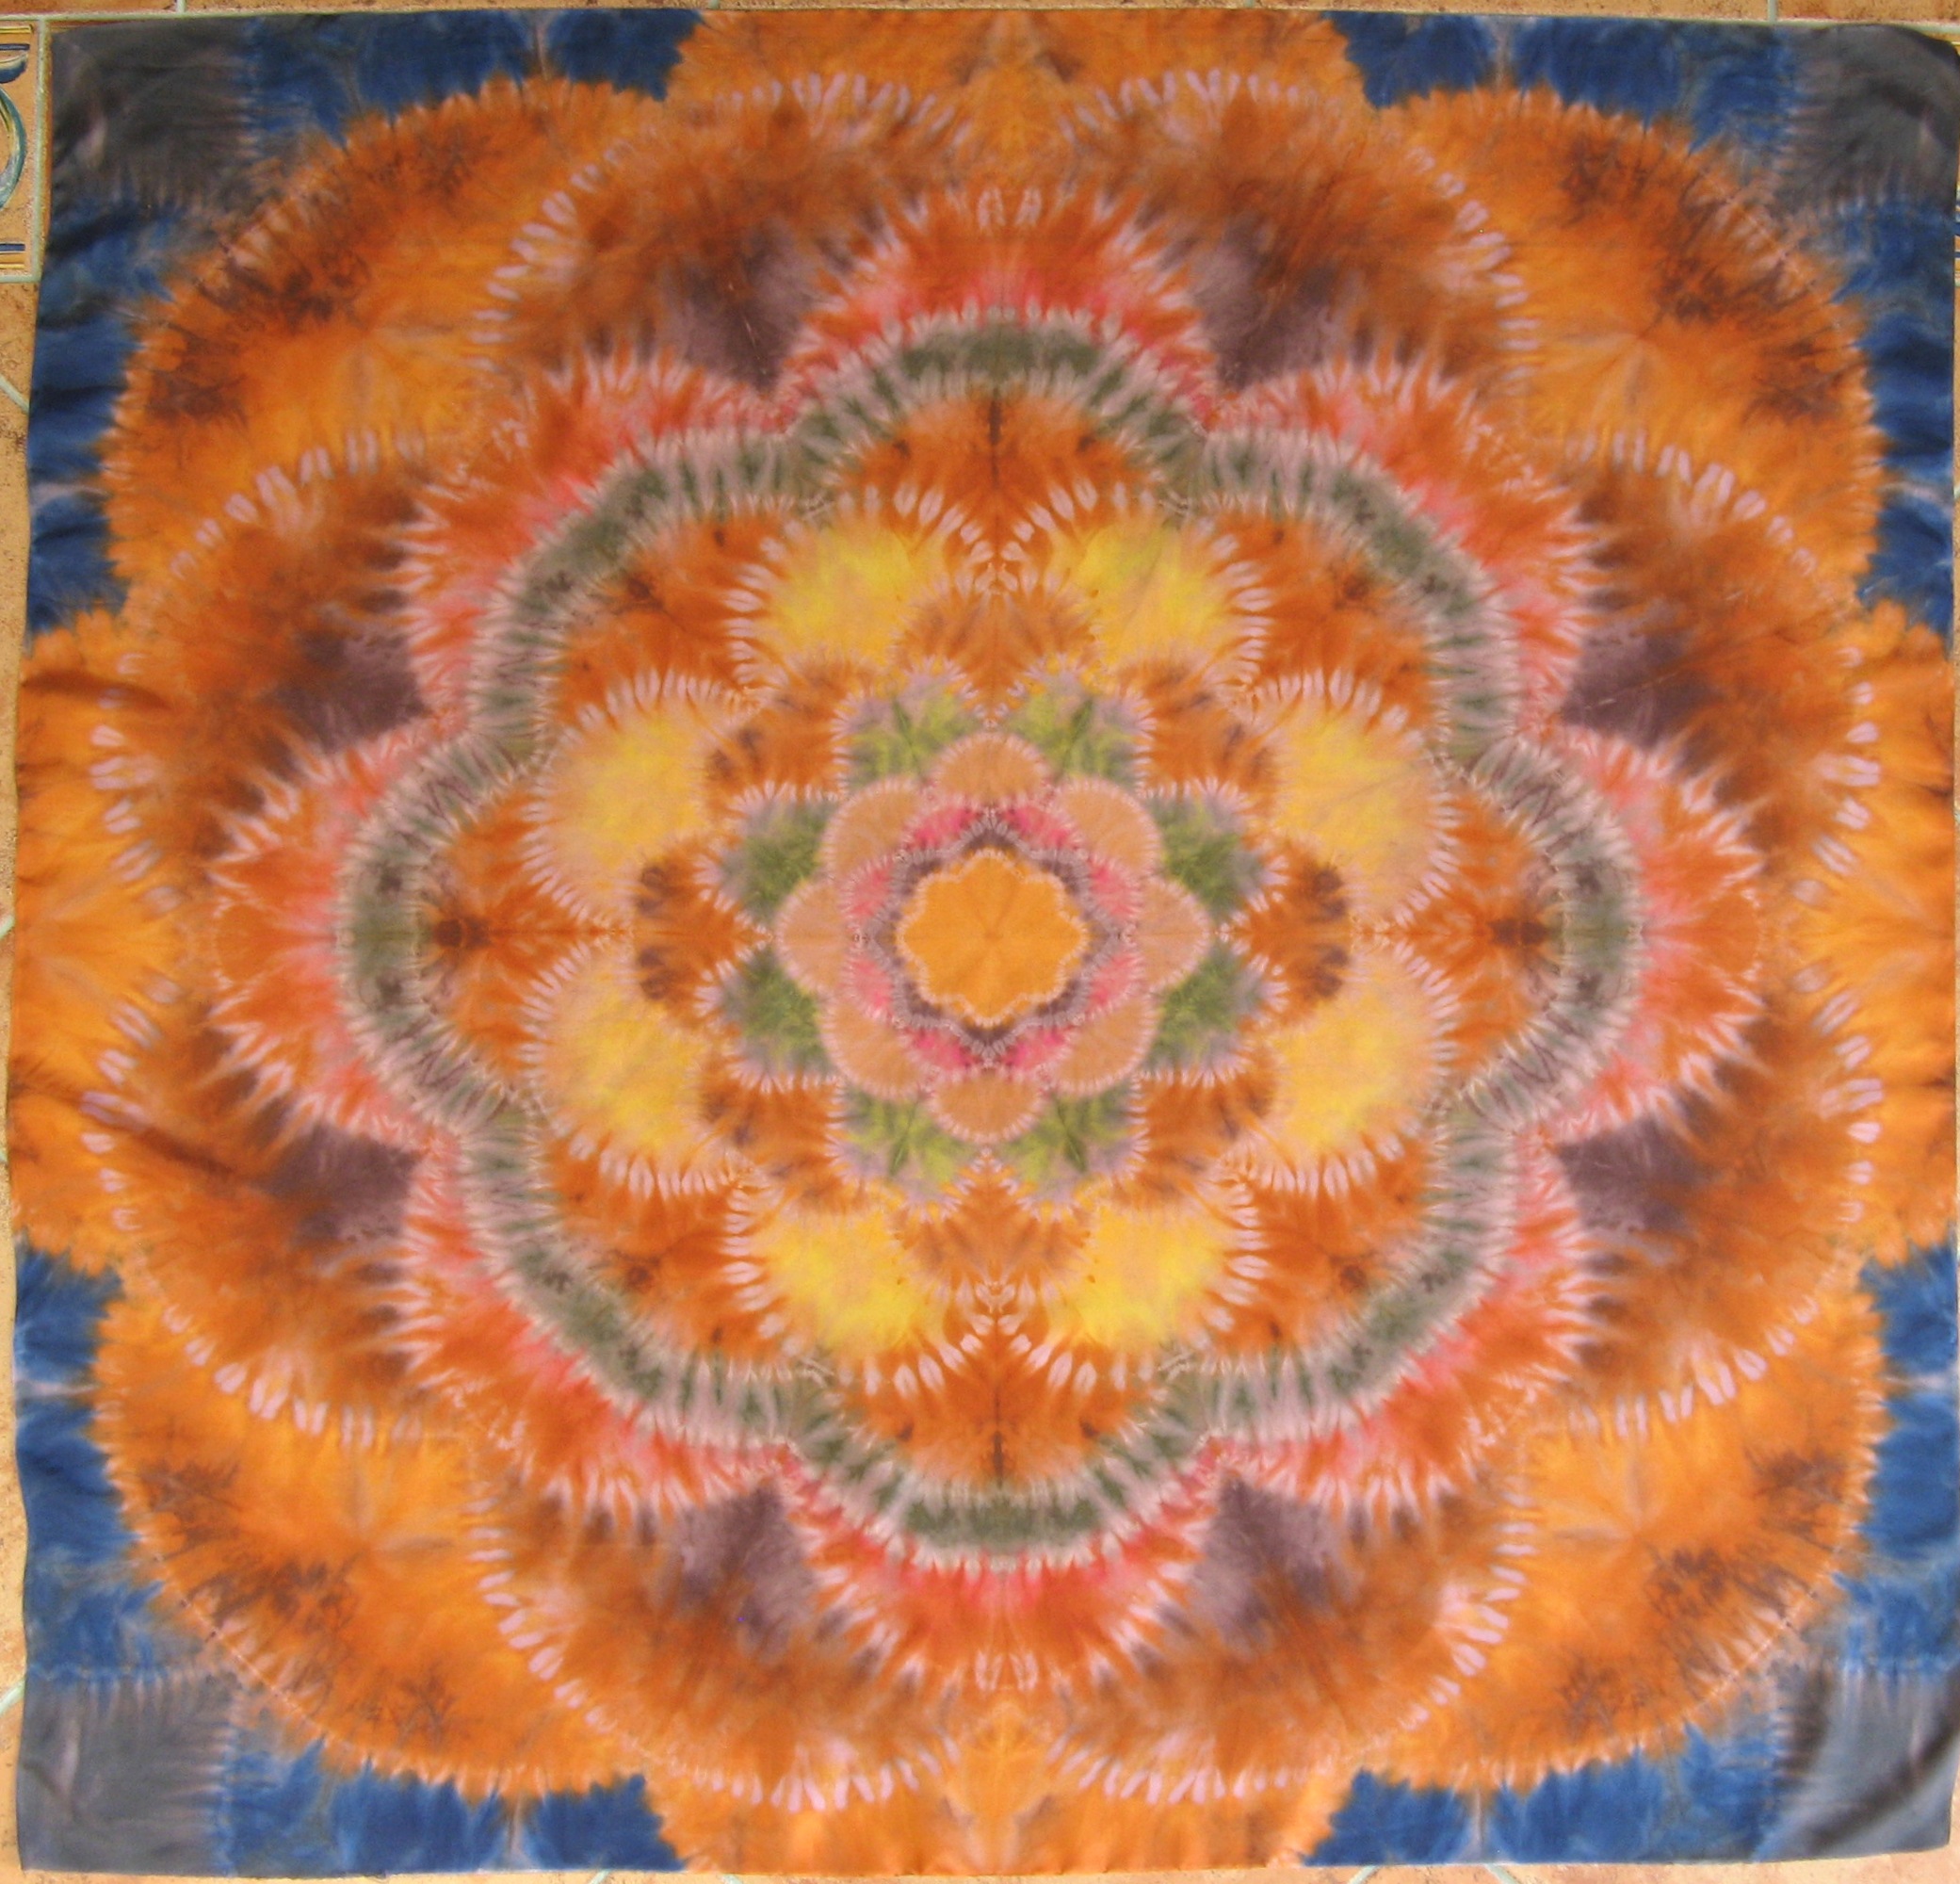
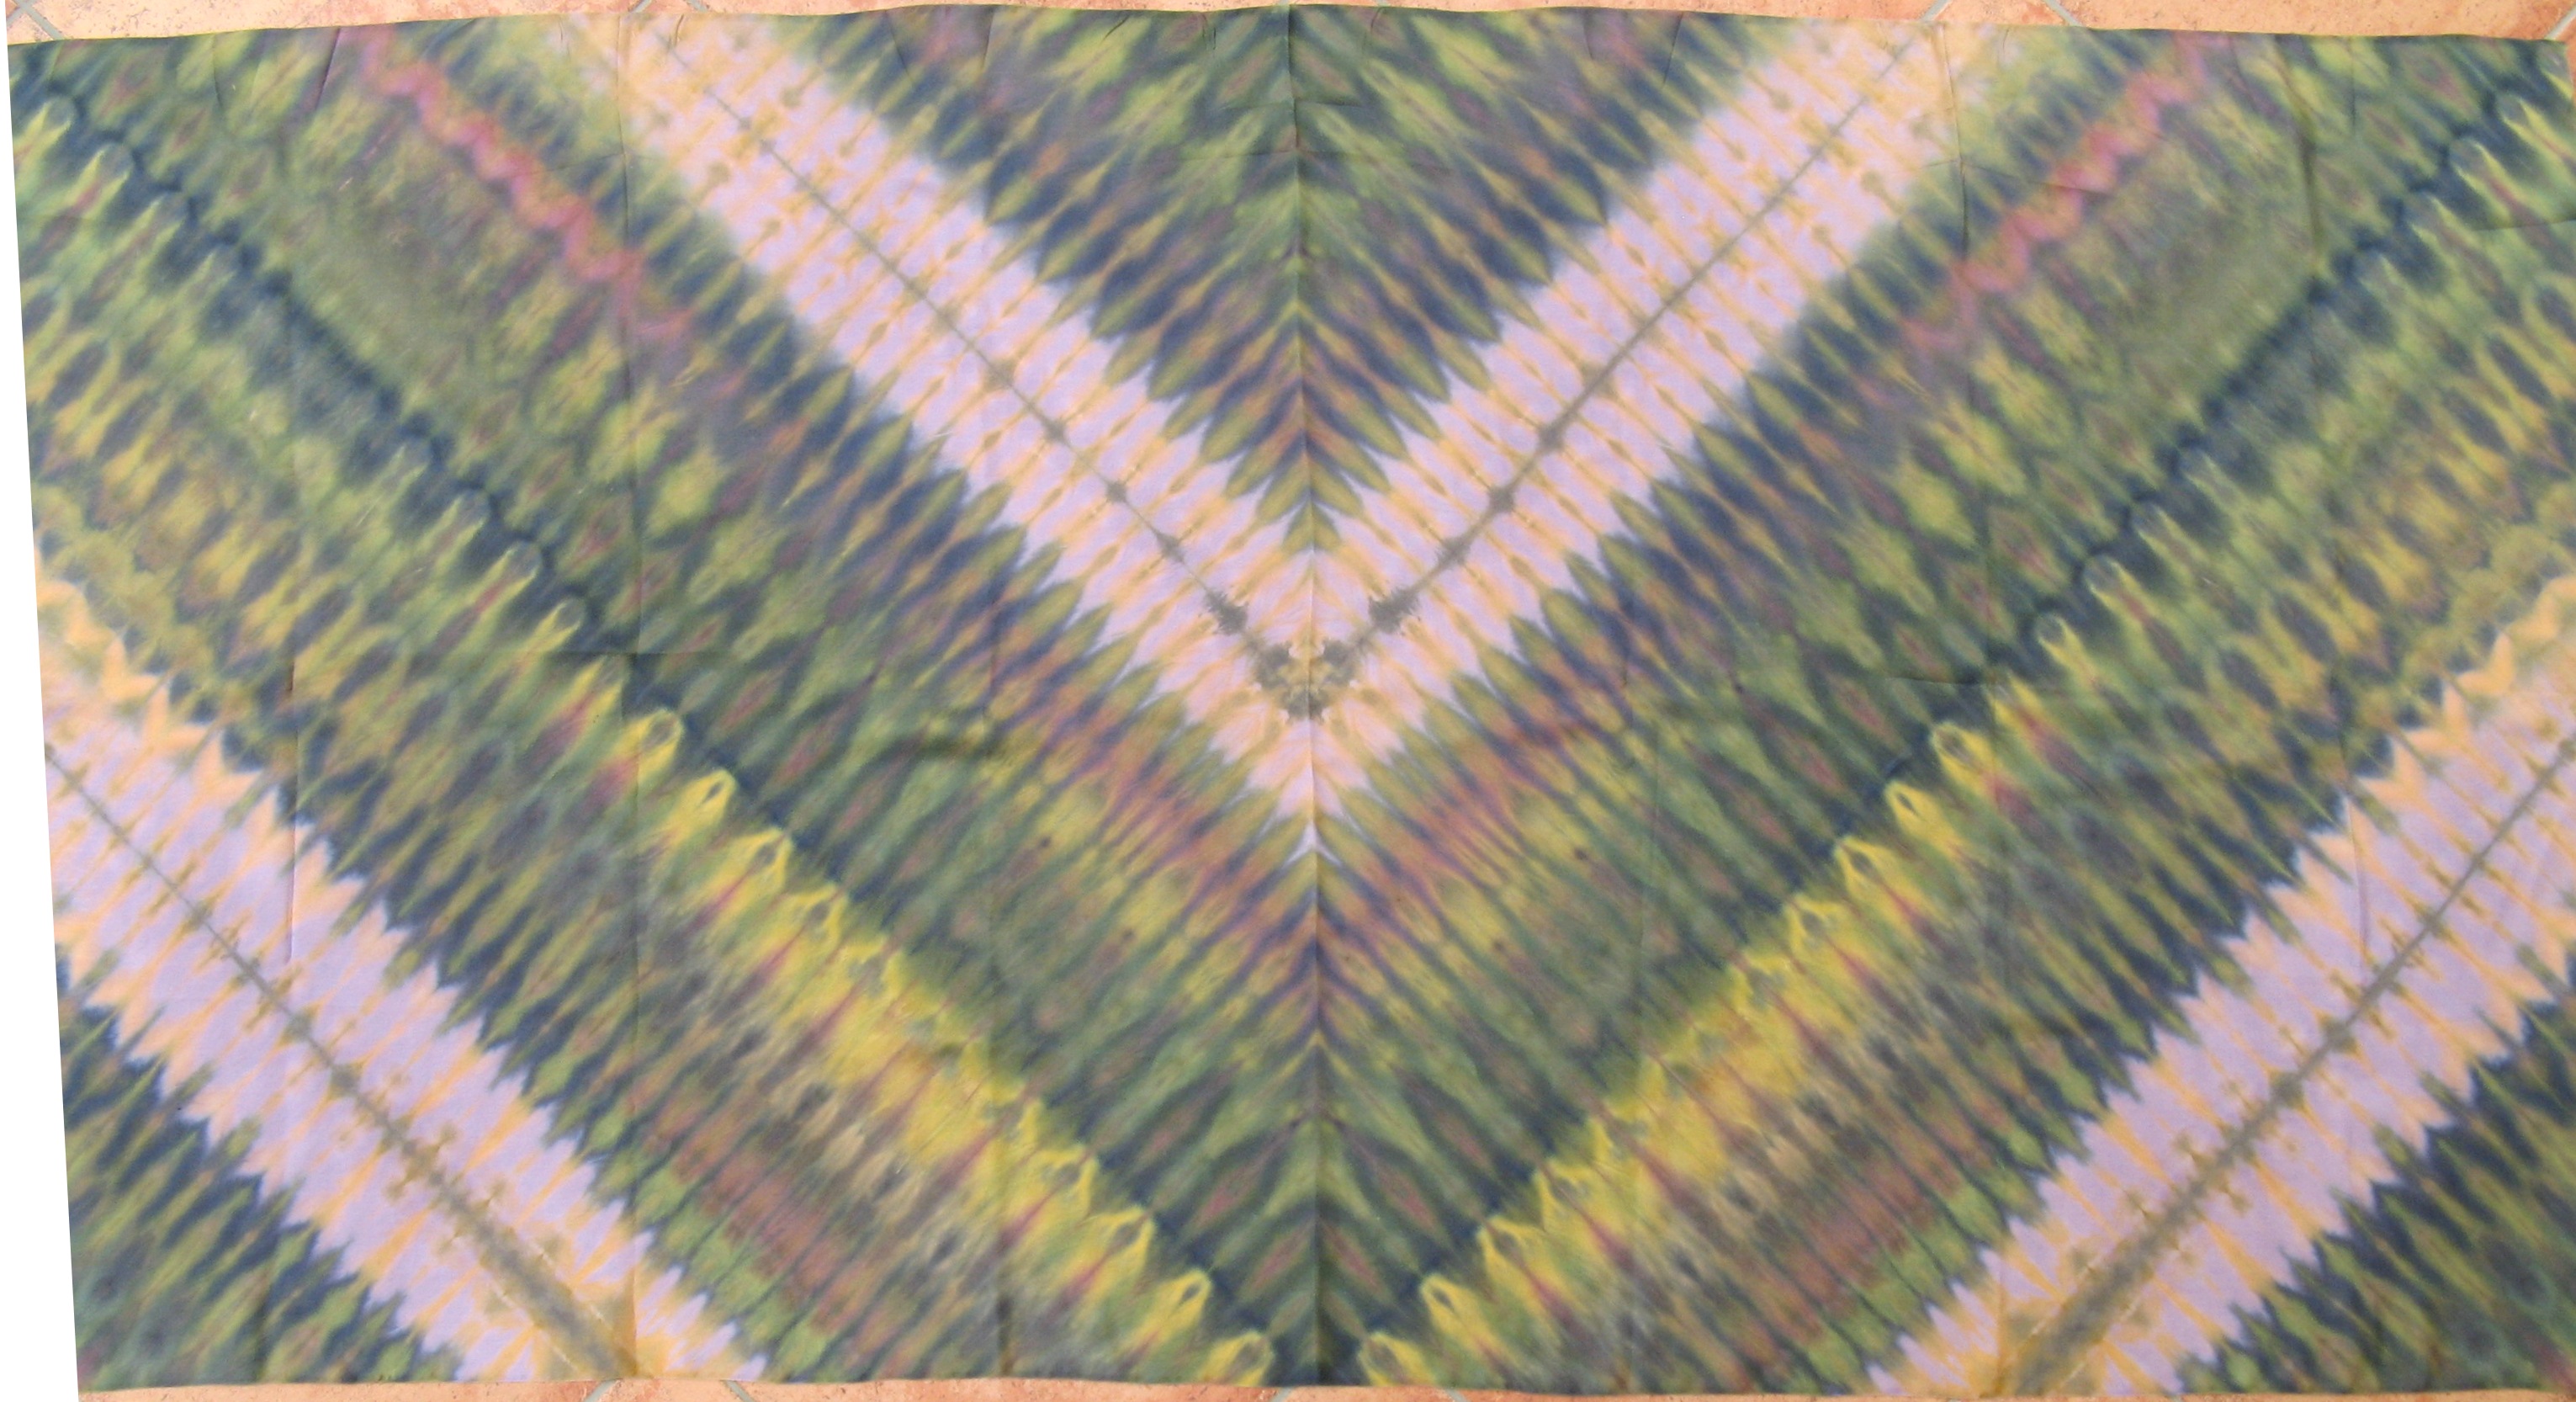
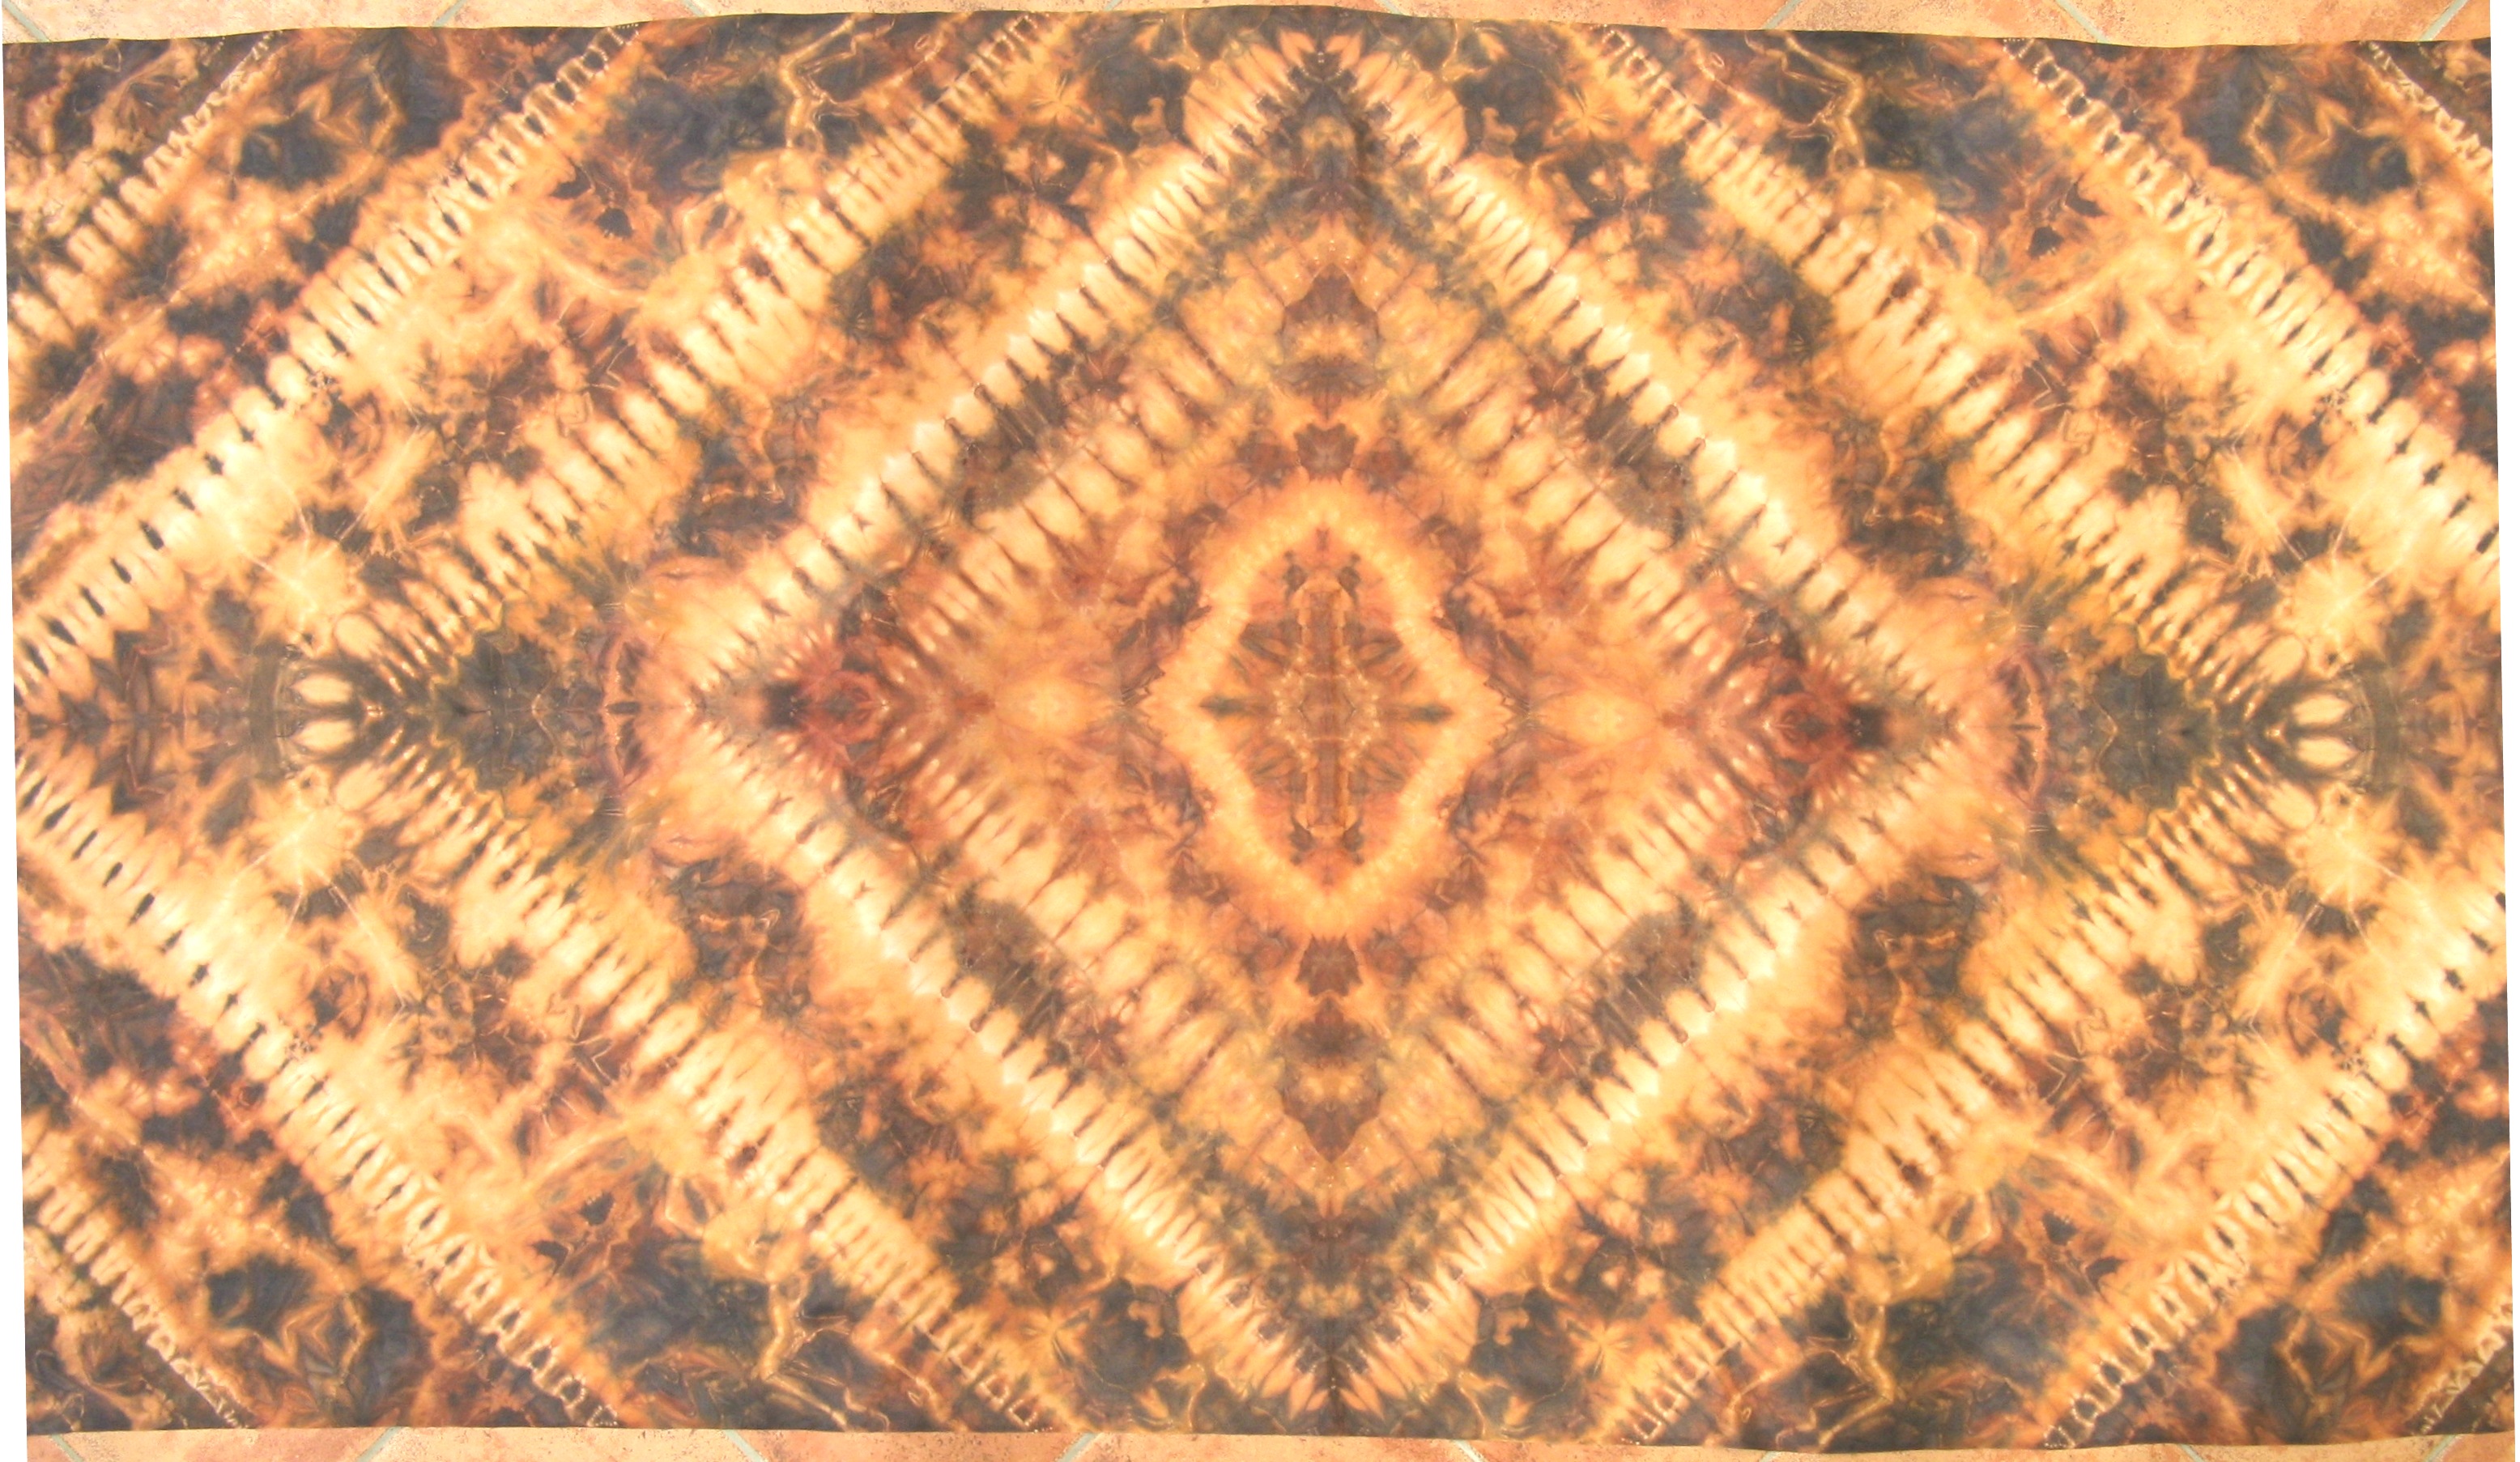
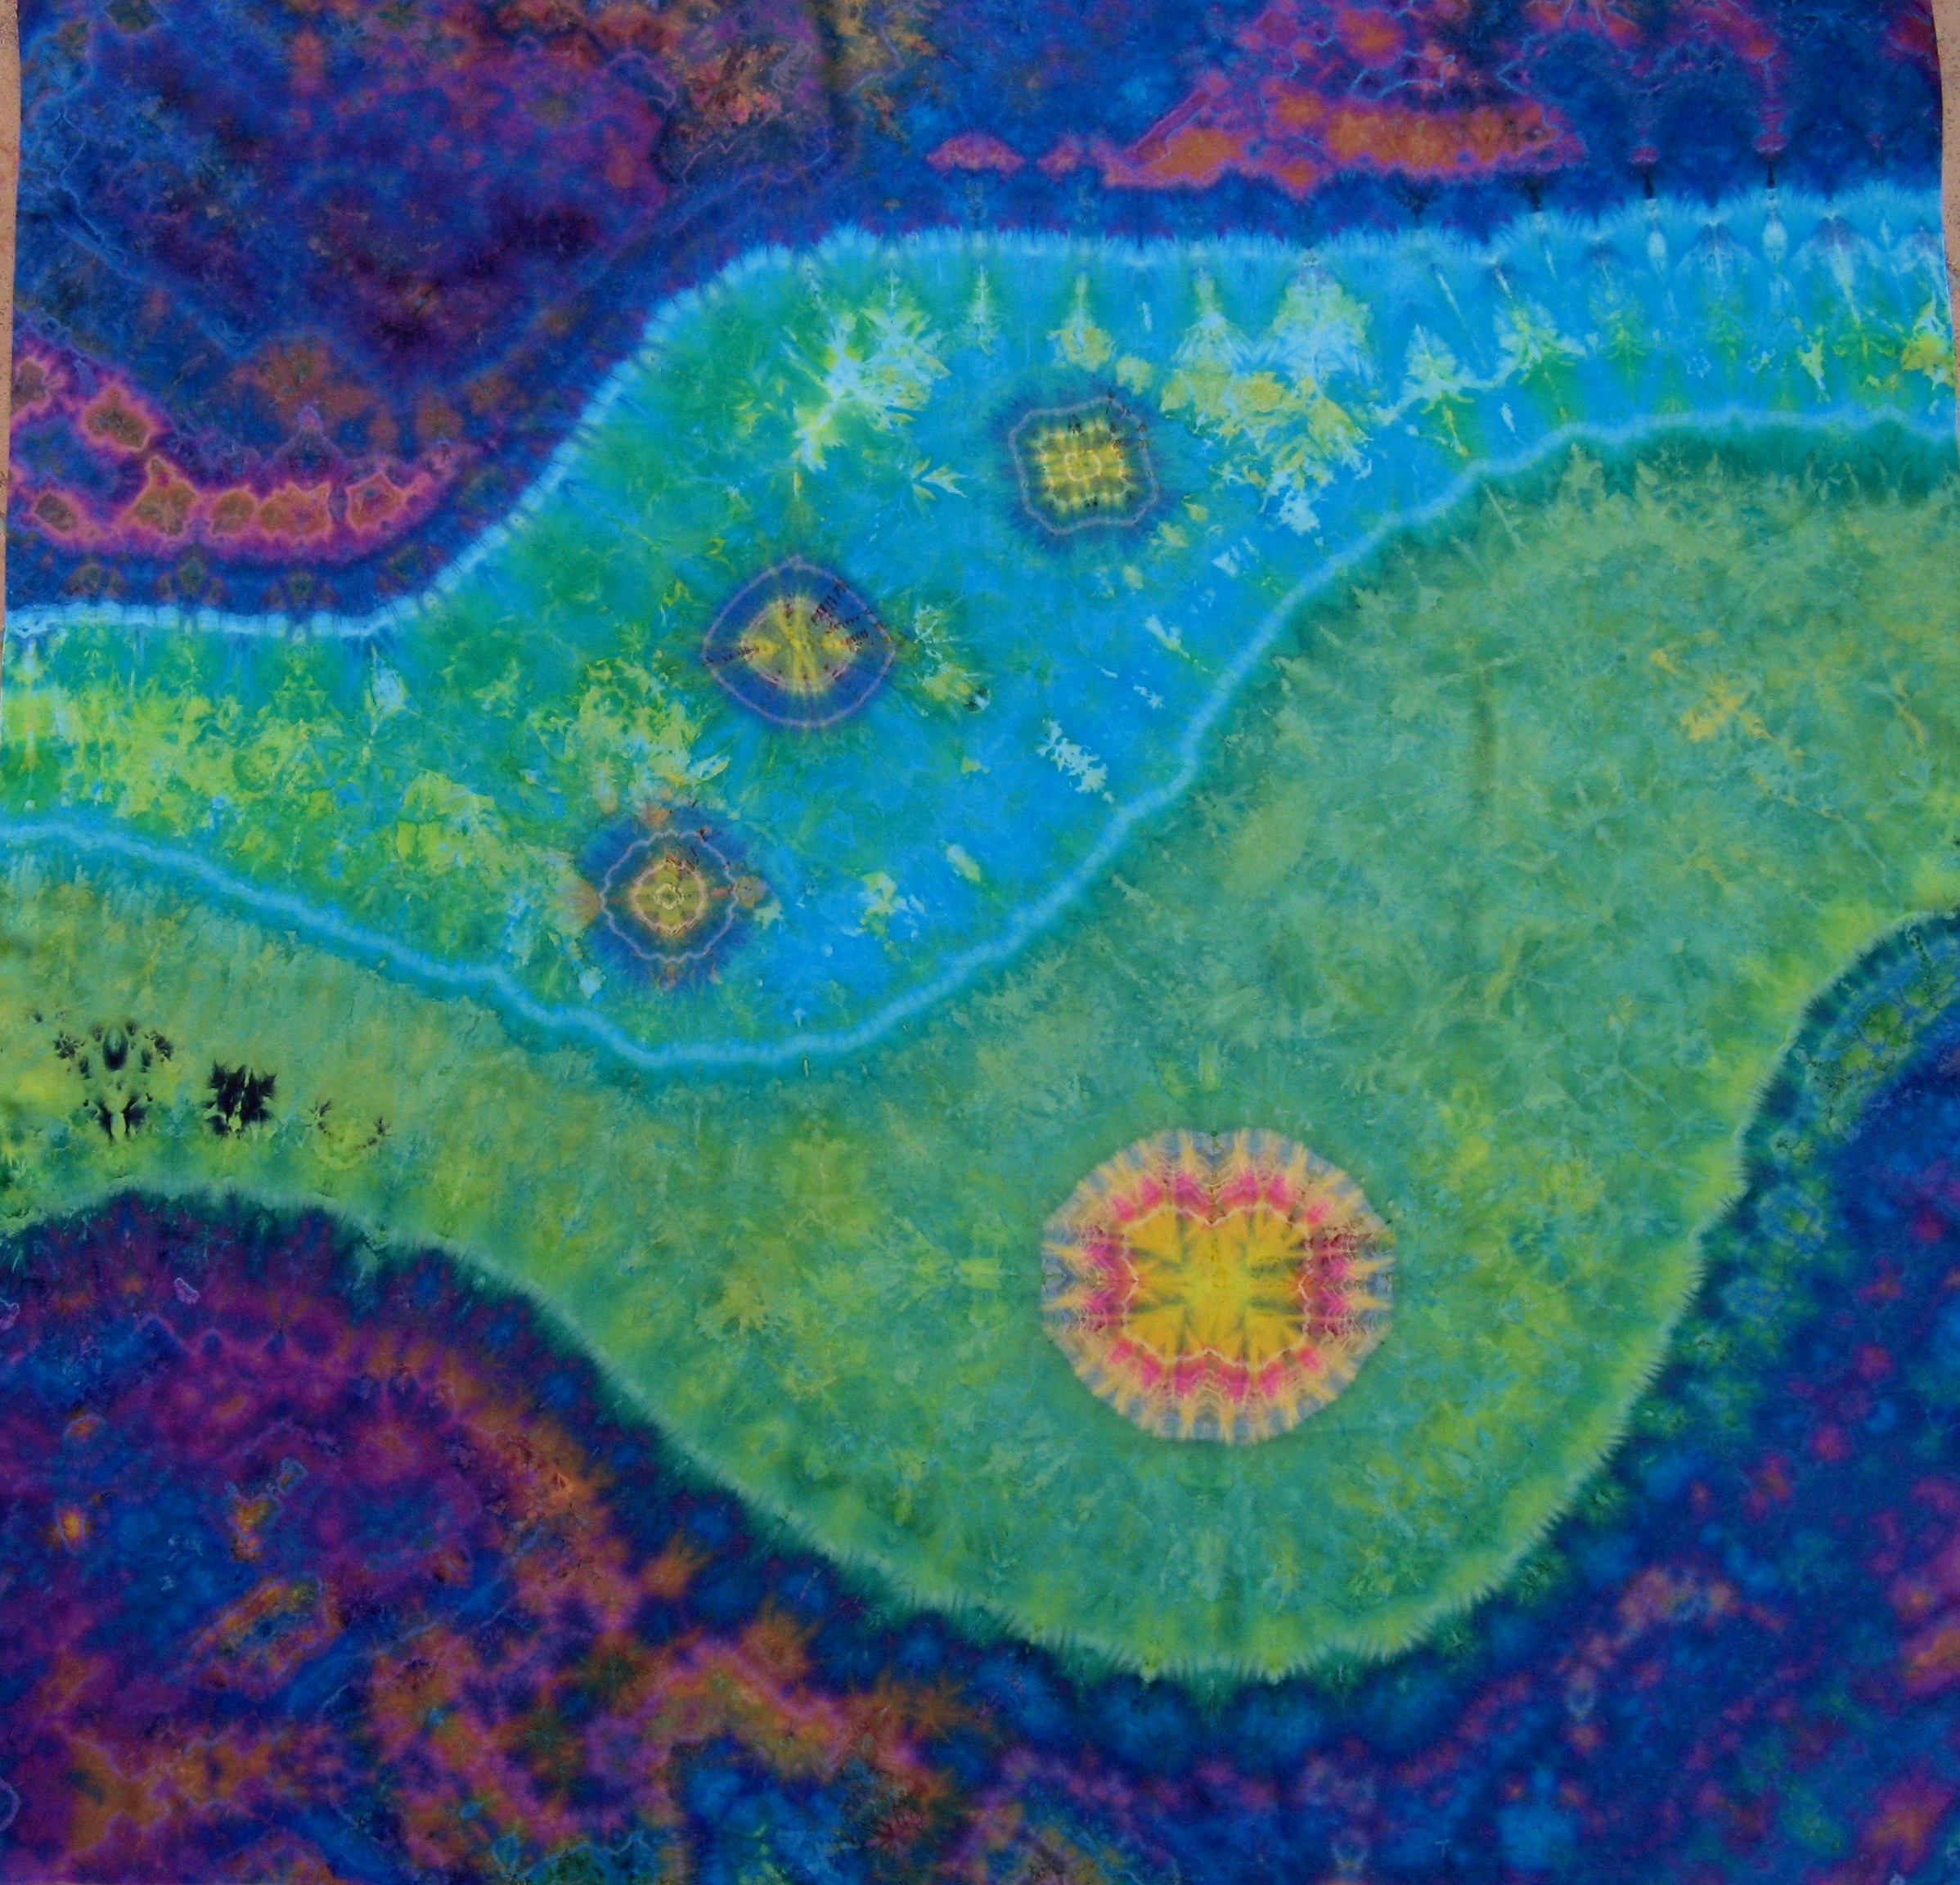
The Donut, another Aussie Shibori technique: examples 19 to 23 (in 19 only a detail). It is a variation of arashi
shibori on a flexible core). I've taught this technique, developed in the early 1990's, widely. Most, except for 22,
are 45" x 45". 22 is a sarong piece 36"x 72". Navette or network shapes visible in close-up are typical of the method. 17
is a good example of the way this method enables us (with careful application of colour) to use together colours which
might usually produce mud - without doing so. Here,
they are a poppy red and turquoise.
24.
 25.
25.
 26.
26.

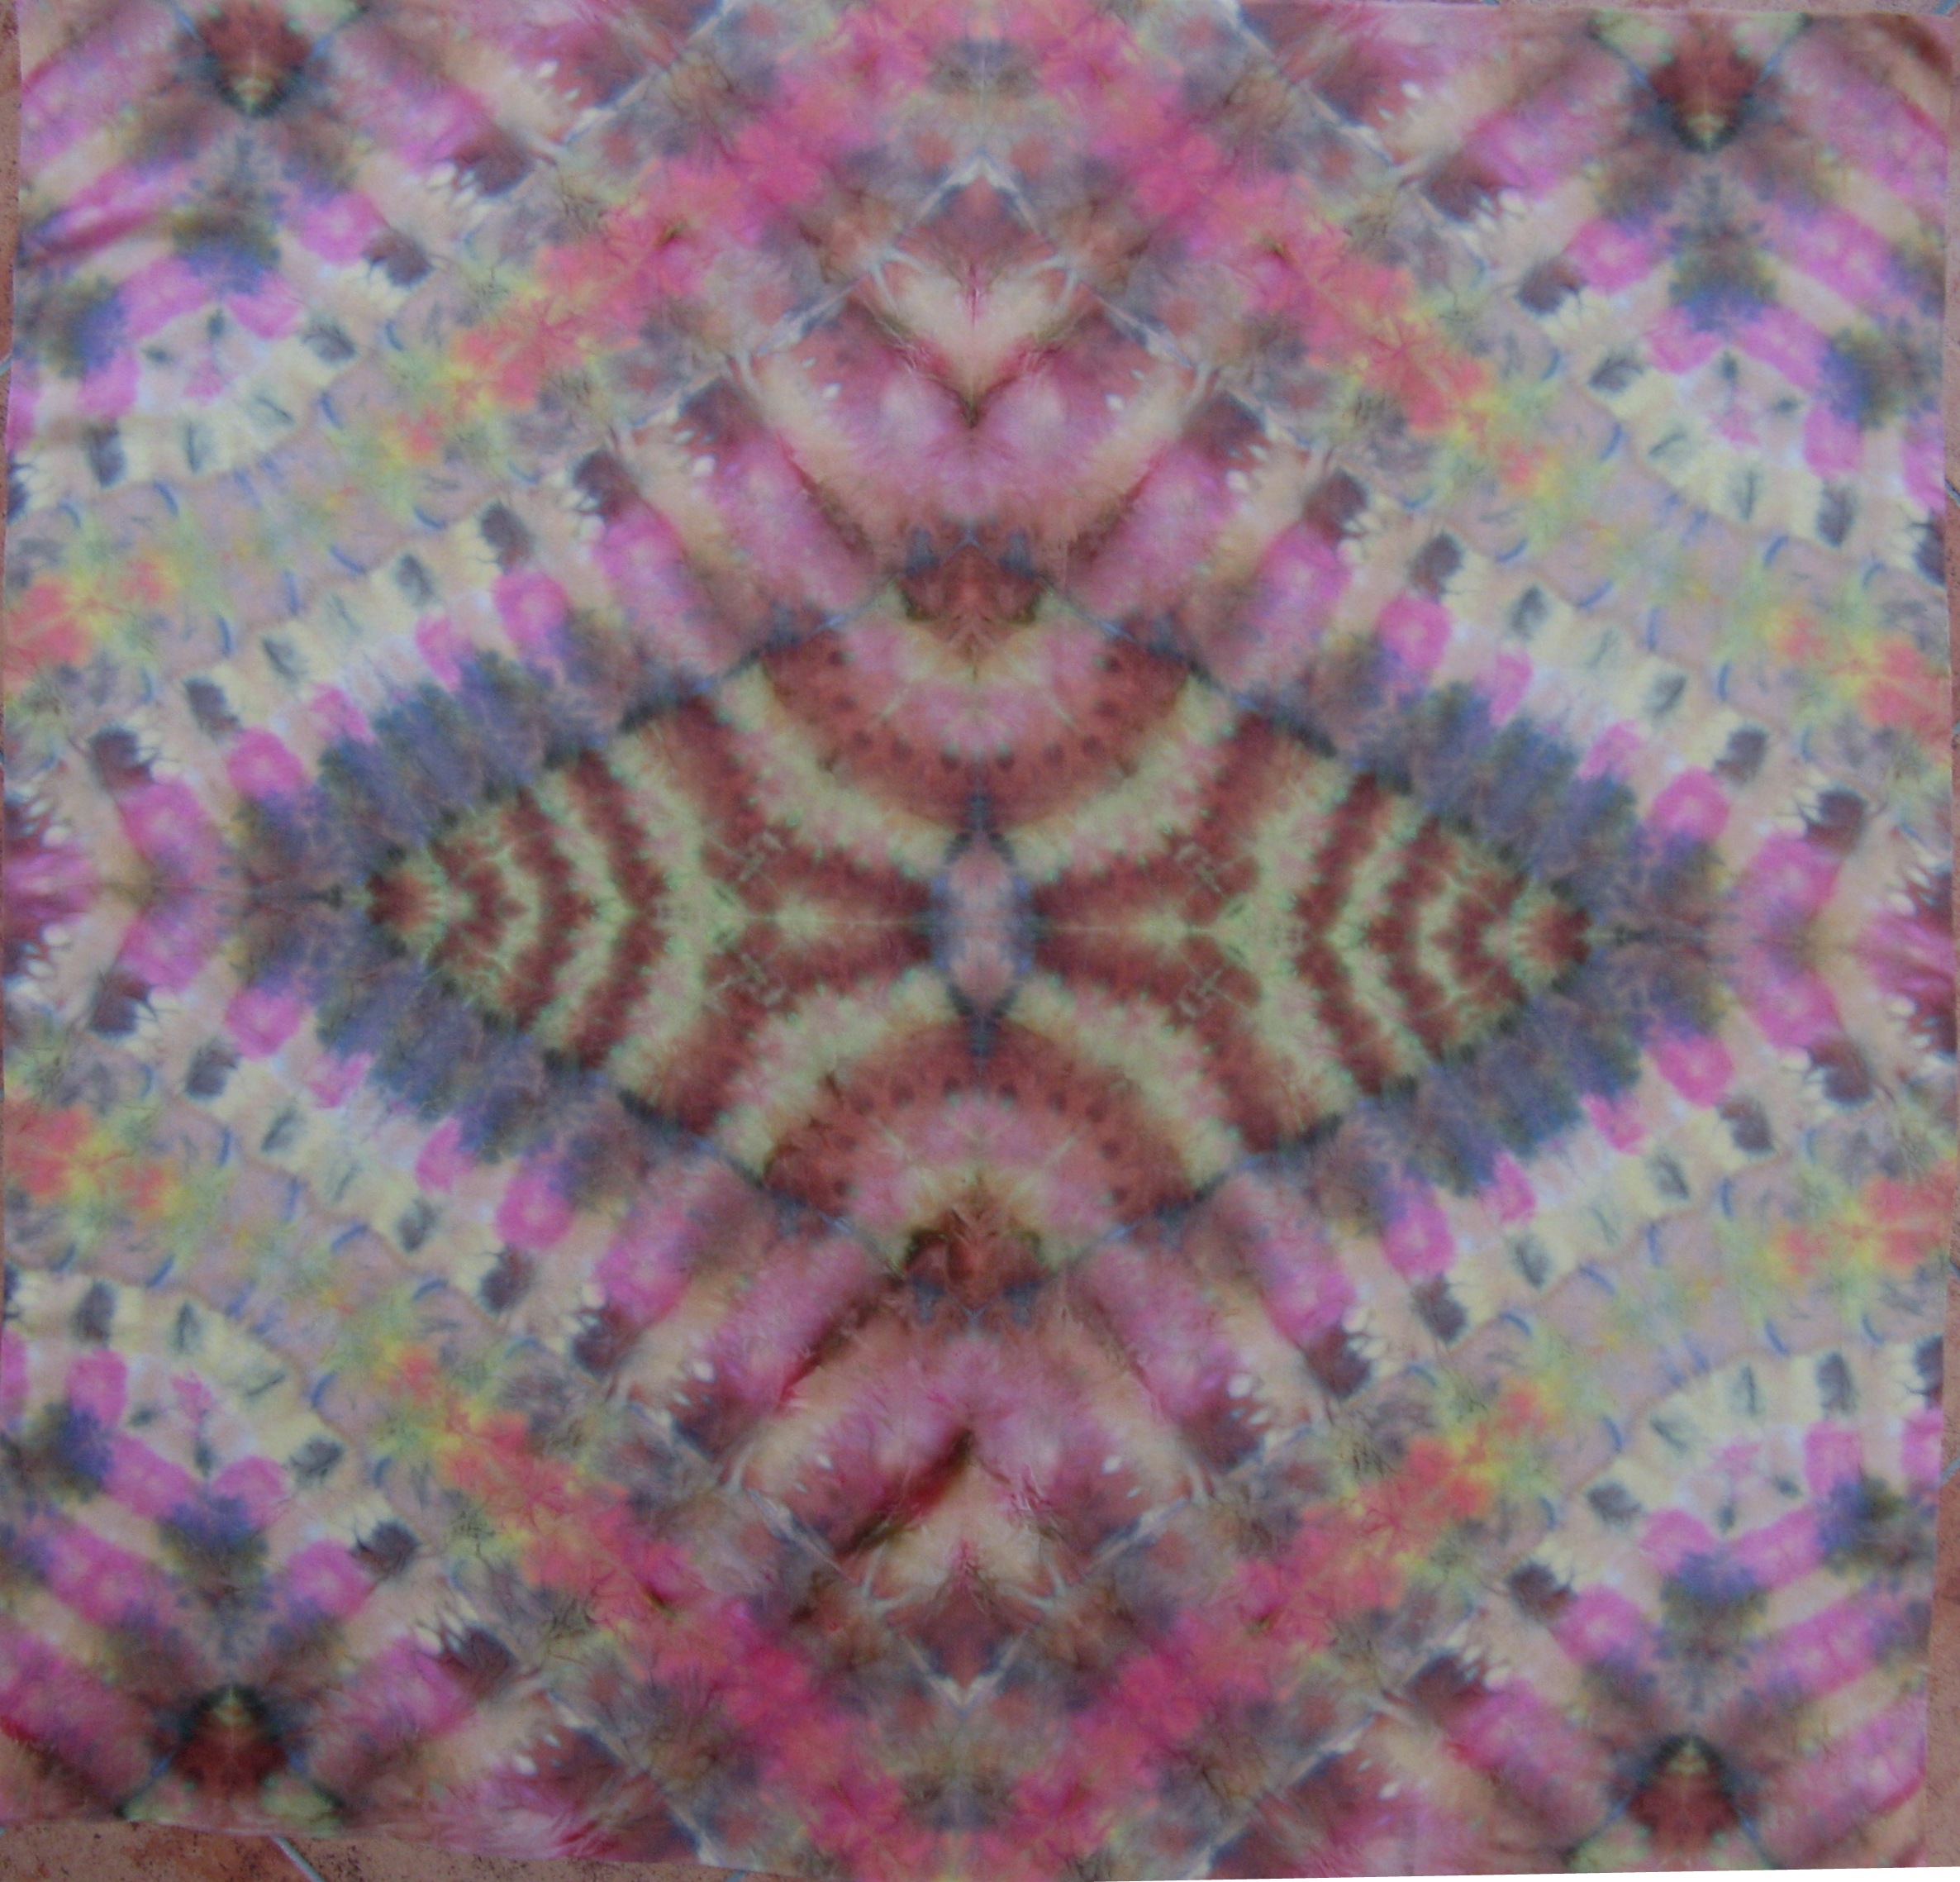
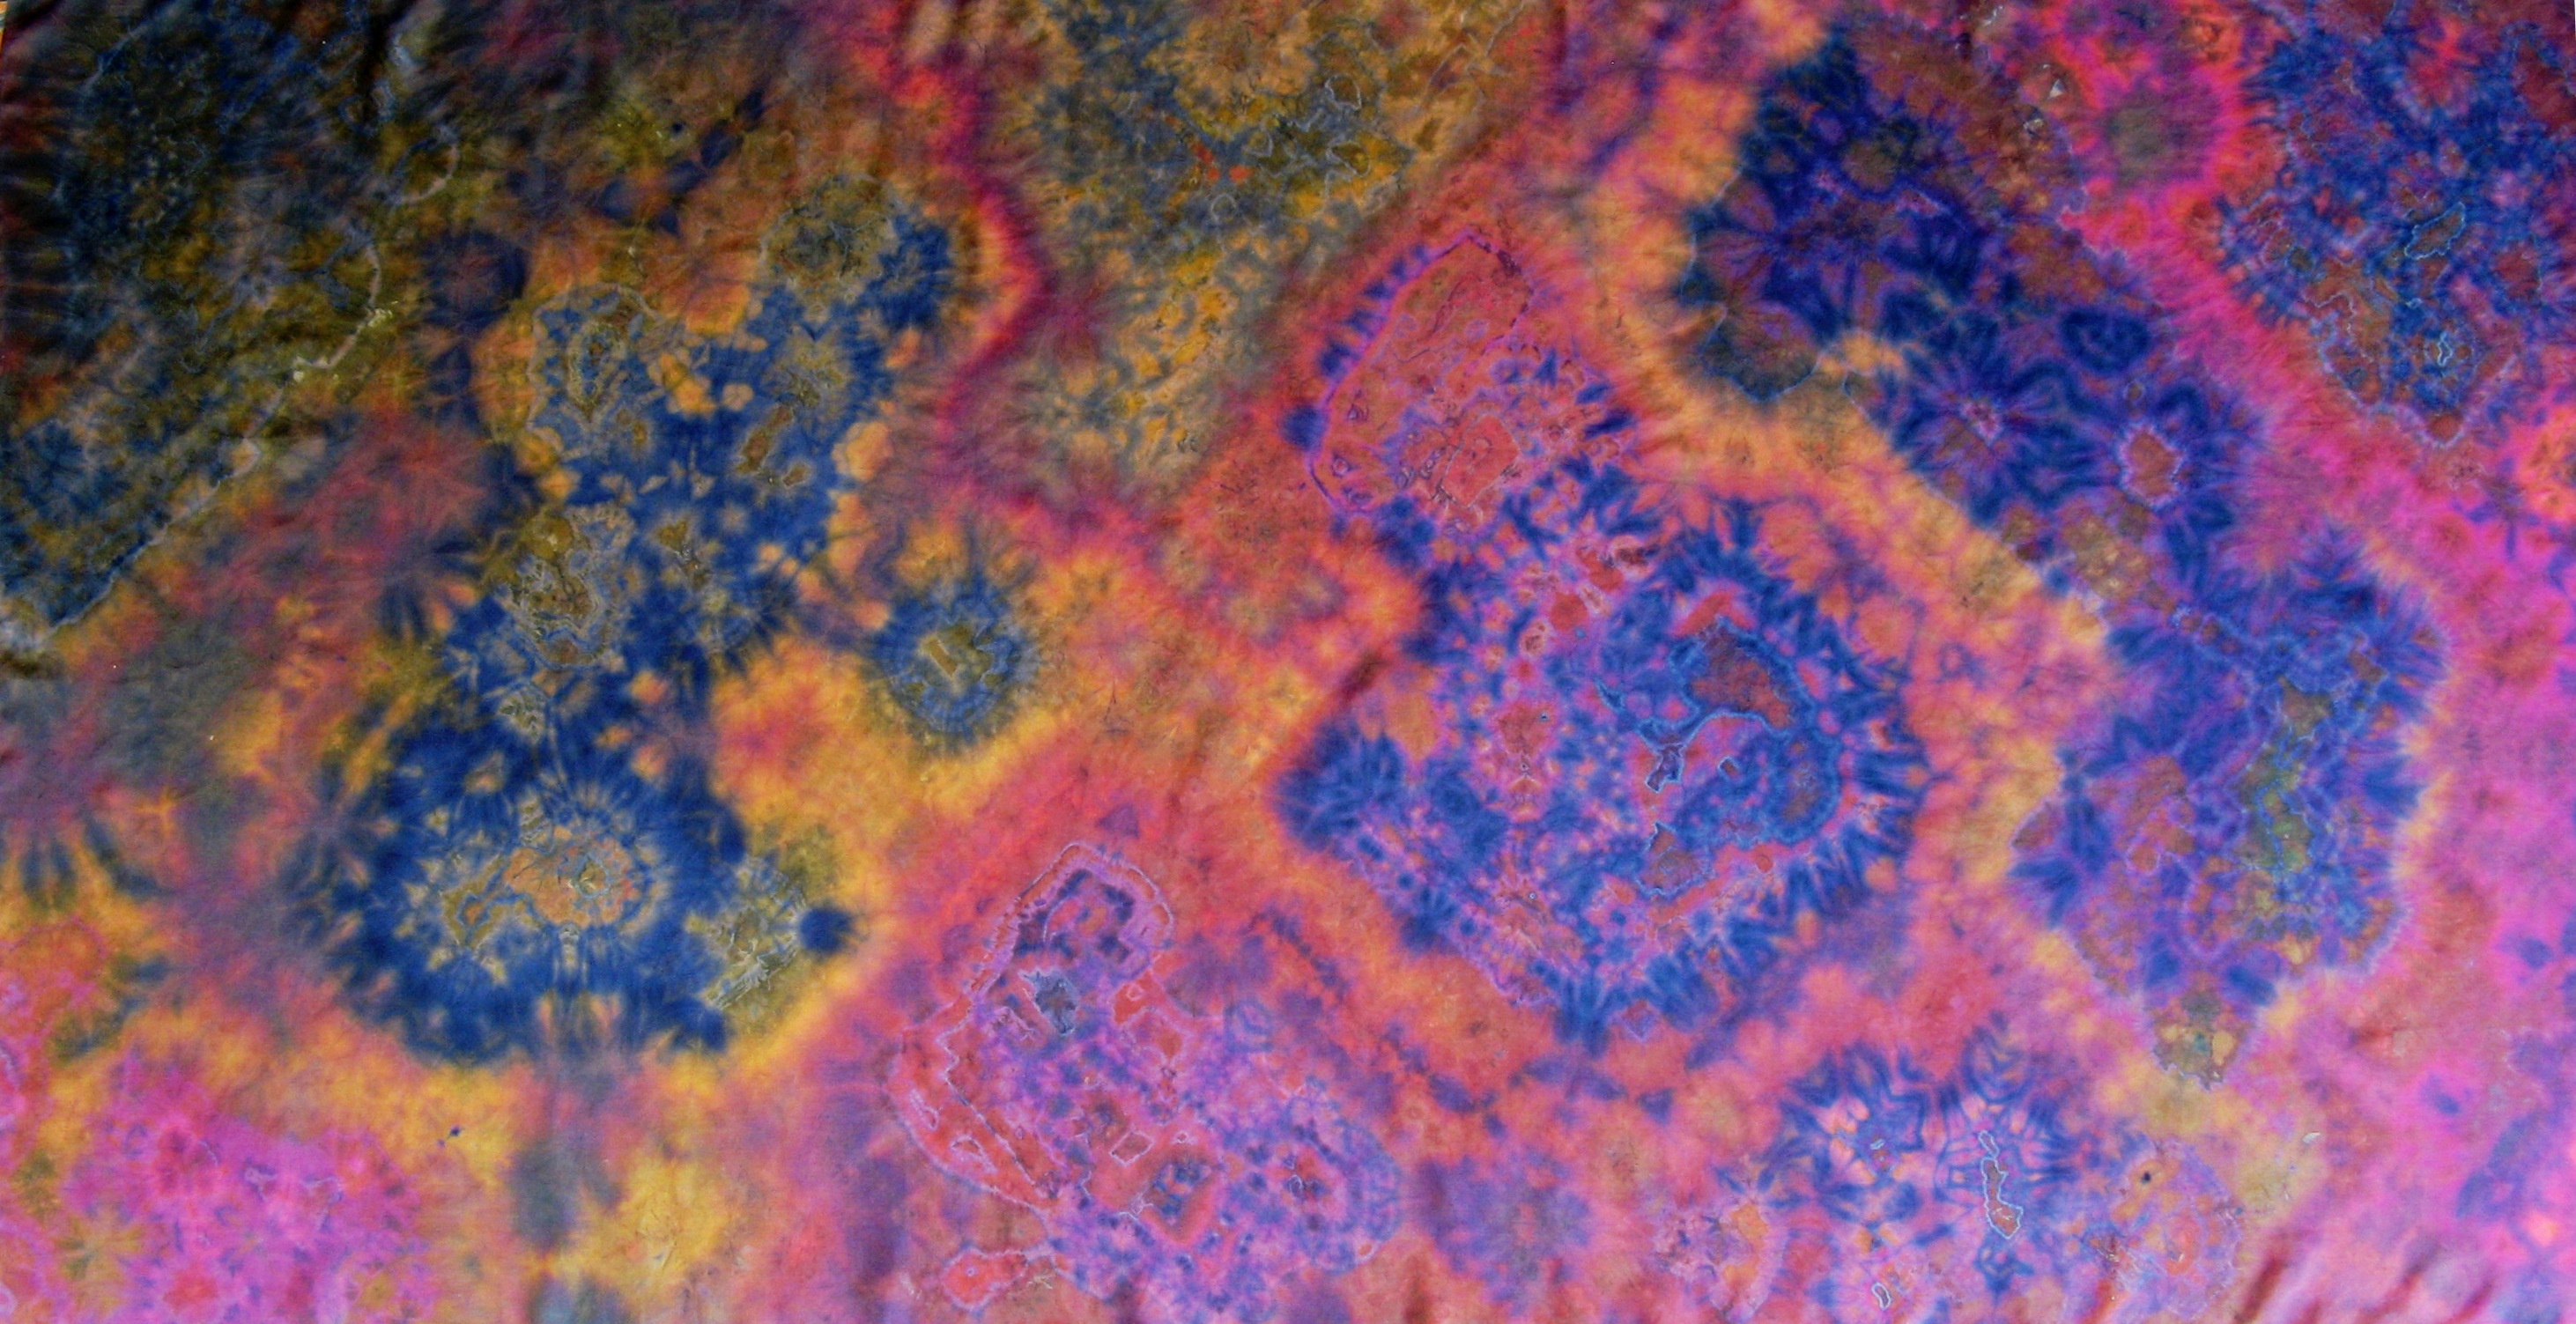
Examples of another Aussie Shibori technique which I call Rorshach technique shibori, as it gives
mirror-image shapes, as those used in the "ïnk-blot" psychology test of that name. A project for a sarong length
featuring one variation of this technique appeared in Down Under Textiles magazine, Issue 6 (November, 2011).
27.
 28.
28.
![]() 29.
29.

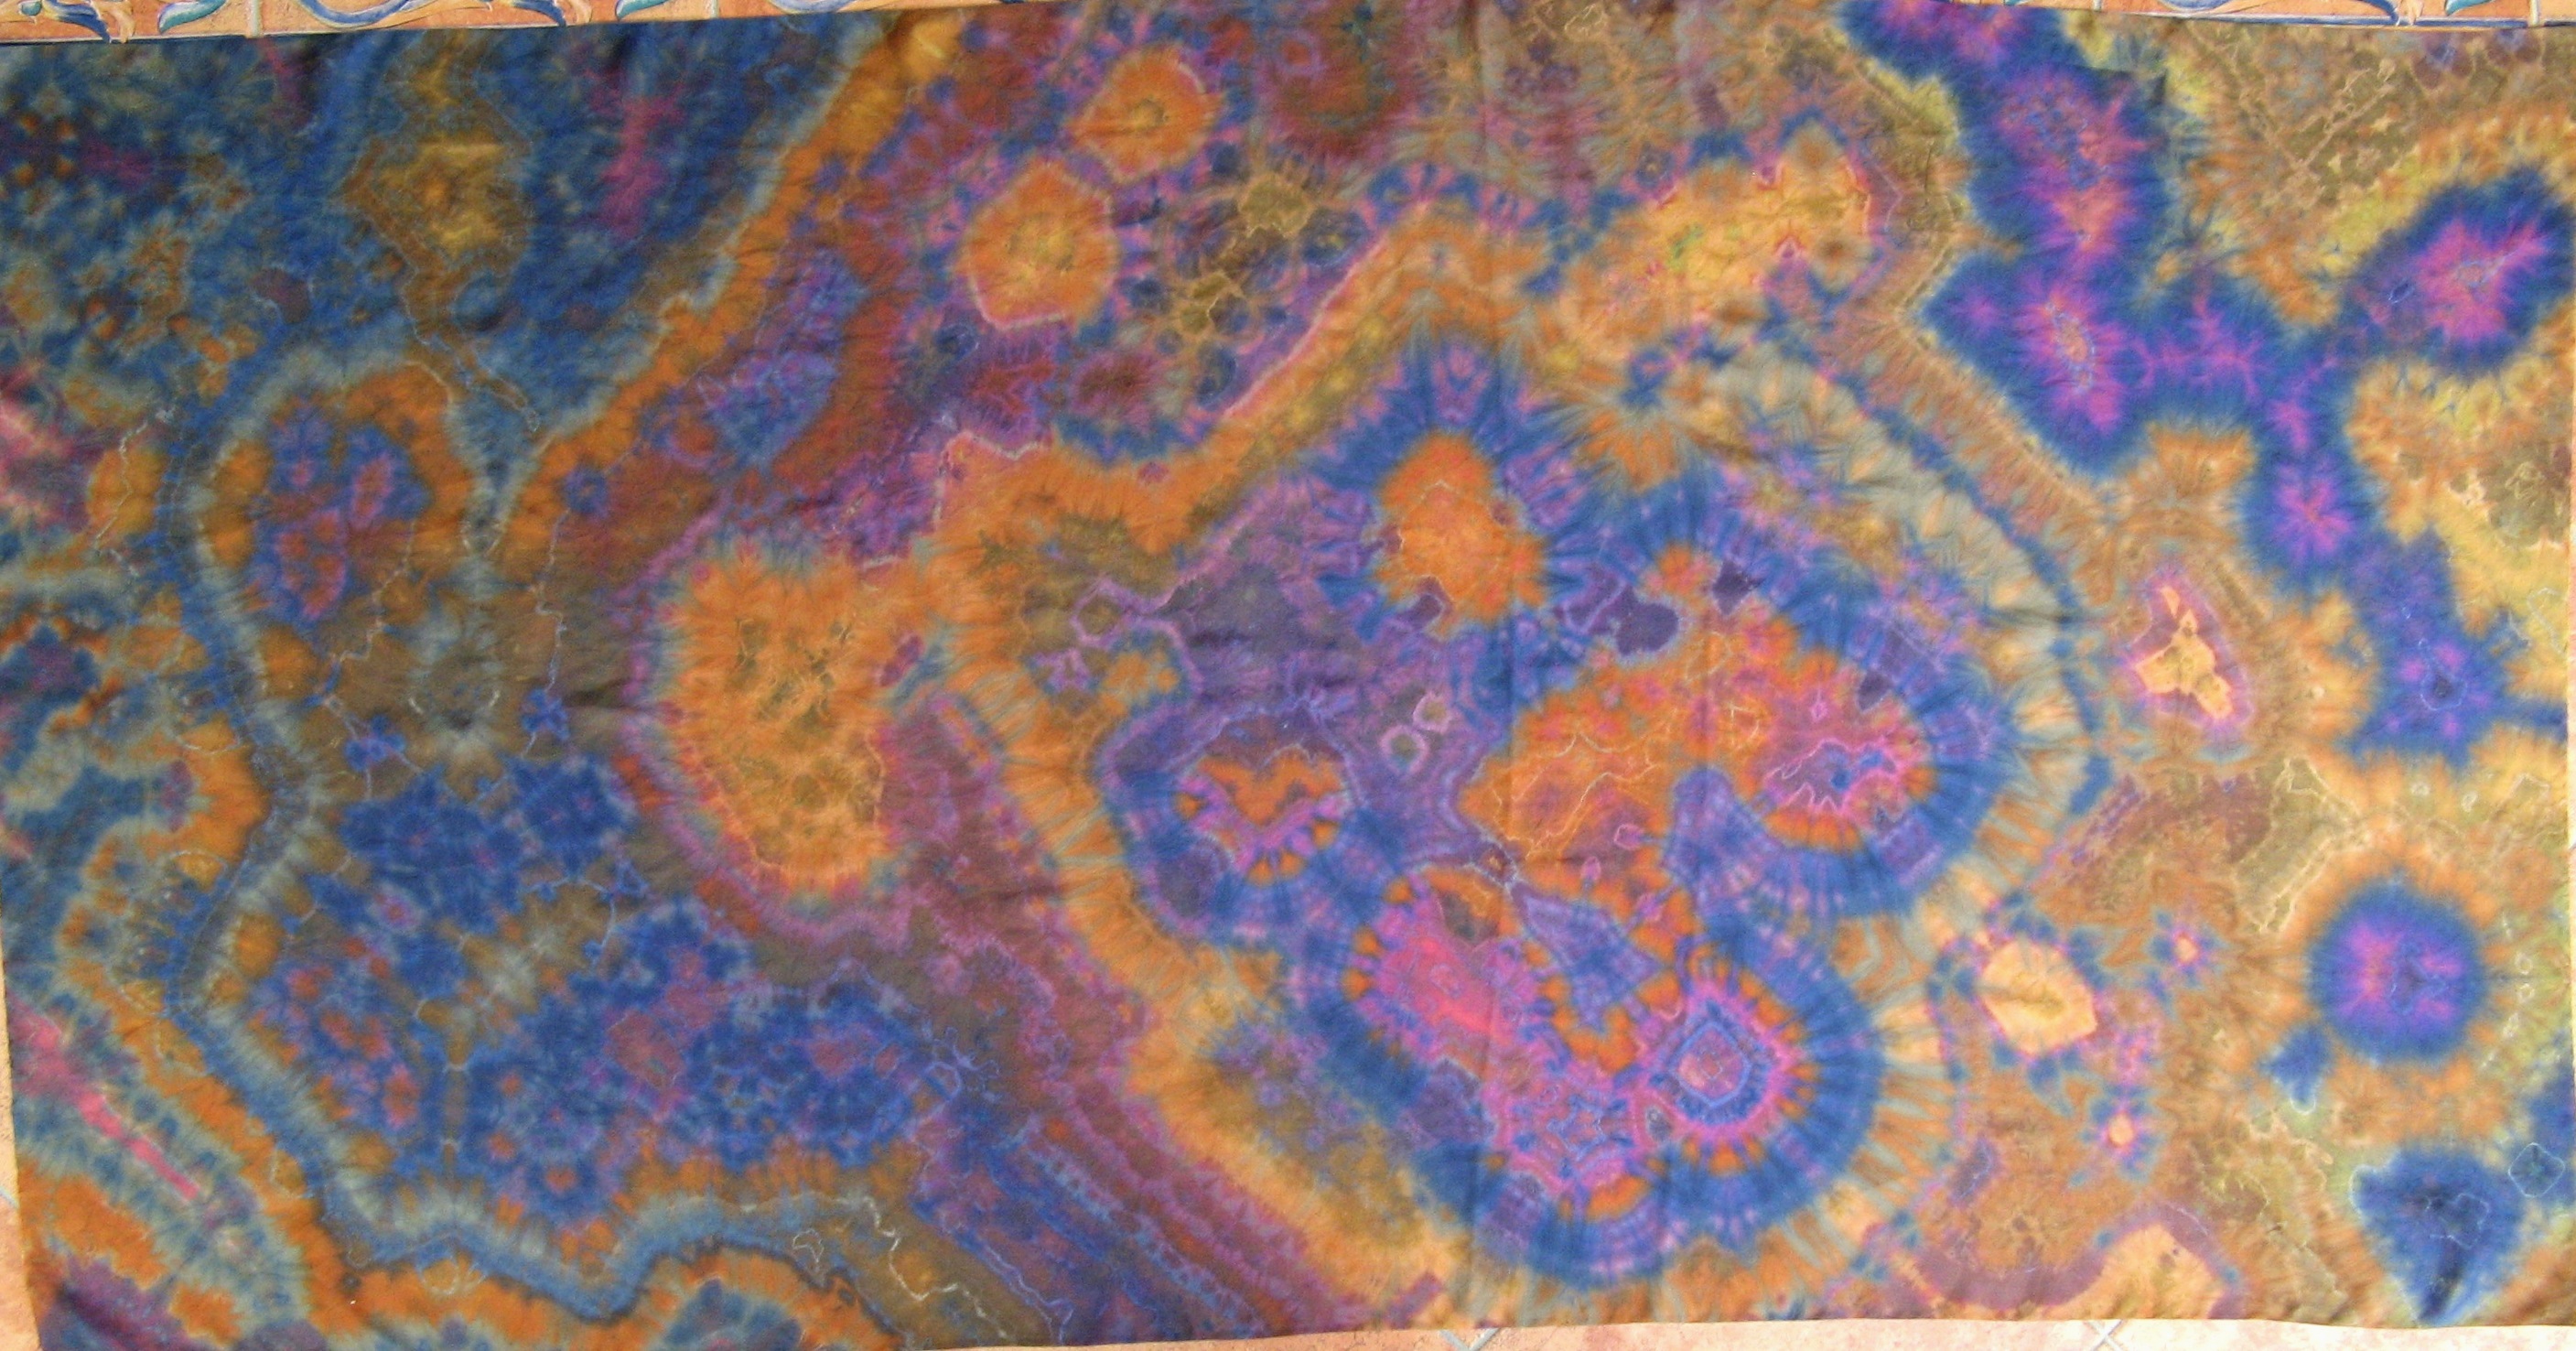
Other sarong lengths, 36" x 72" (90cm x 180cm) in Rorshach Technique shibori. 29 is double Rorshach technique.
The result is suggestive of a deconstructed tartan (plaid).
30.
 31.
31.
.JPG) 32.
32.
.JPG)
Examples of an Aussie Shibori method I call Pictorial Shibori, which I have taught both in Queensland (at the Alpha
School of Creative Arts in 1997) and in Houston, TX, in 2002. 30 shows part of a length dyed by this method. The
shibori pattern is all mirror-imaged from the centre of the length (the selvages being top and bottom in 25). It is
intended for use in a kimono, with mirror-imaged shibori patterns from centre back. The picture was taken in Auckland,
NZ, in 2000.
I called this method Pictorial Shibori because it produces strange and interesting pictorial effects, like animal, human
or grotesque masks or figures. These are often repeated and formalised by mirror-image repetition. In 32 above (a detail of
the centre of the piece in 31), you can see (in the top half) what can be read as a lion's mask, apparently wearing a
wreath of leaves. Below it, is what might be the mask of some dog, perhaps a hyena (though of course it's really the
reverse (upside-down) mirror-image of the "lion's" mask).
33.
 34.
34.
.JPG)
33 is a sarong-sized piece (see above for dimensions) intended for a butterfly top (caftans are making a
comeback, we're told). The design contains mirror-imaging in four channels along the length, so there is symmetry
in each area, though overall, the design is intentionally asymmetrical. 34 shows the front (half). The whole back
mirrors it from the shoulder line.
35.
 36.
36.

Another sarong-length/butterfly-top piece in Pictorial Shibori, this time mirror-imaging on both
horizontal and vertical axes. (I couldn't achieve consistent colour in both images. The photos were taken in
our sunroom, under one of the shadecloth sails under the glass roof. 35 was taken when the sun was
out, so it's yellower, even though it was in the shade. Also, in 35, the two apparent darker yellow
vertical bands either side of the centre are the shadows of the beams supporting the glass roof.)
* N.B. A microwave oven used for setting dyes should never again be used for food. Keeping items
used for dyeing rigidly separate from those used for preparation and consumption of food is regarded as
standard safe studio practice. You have read it here. Read it again - with other details about microwave-setting
- in Down Under Textiles Issue #6.
37.
 38.
38.
39.
 40.
40.

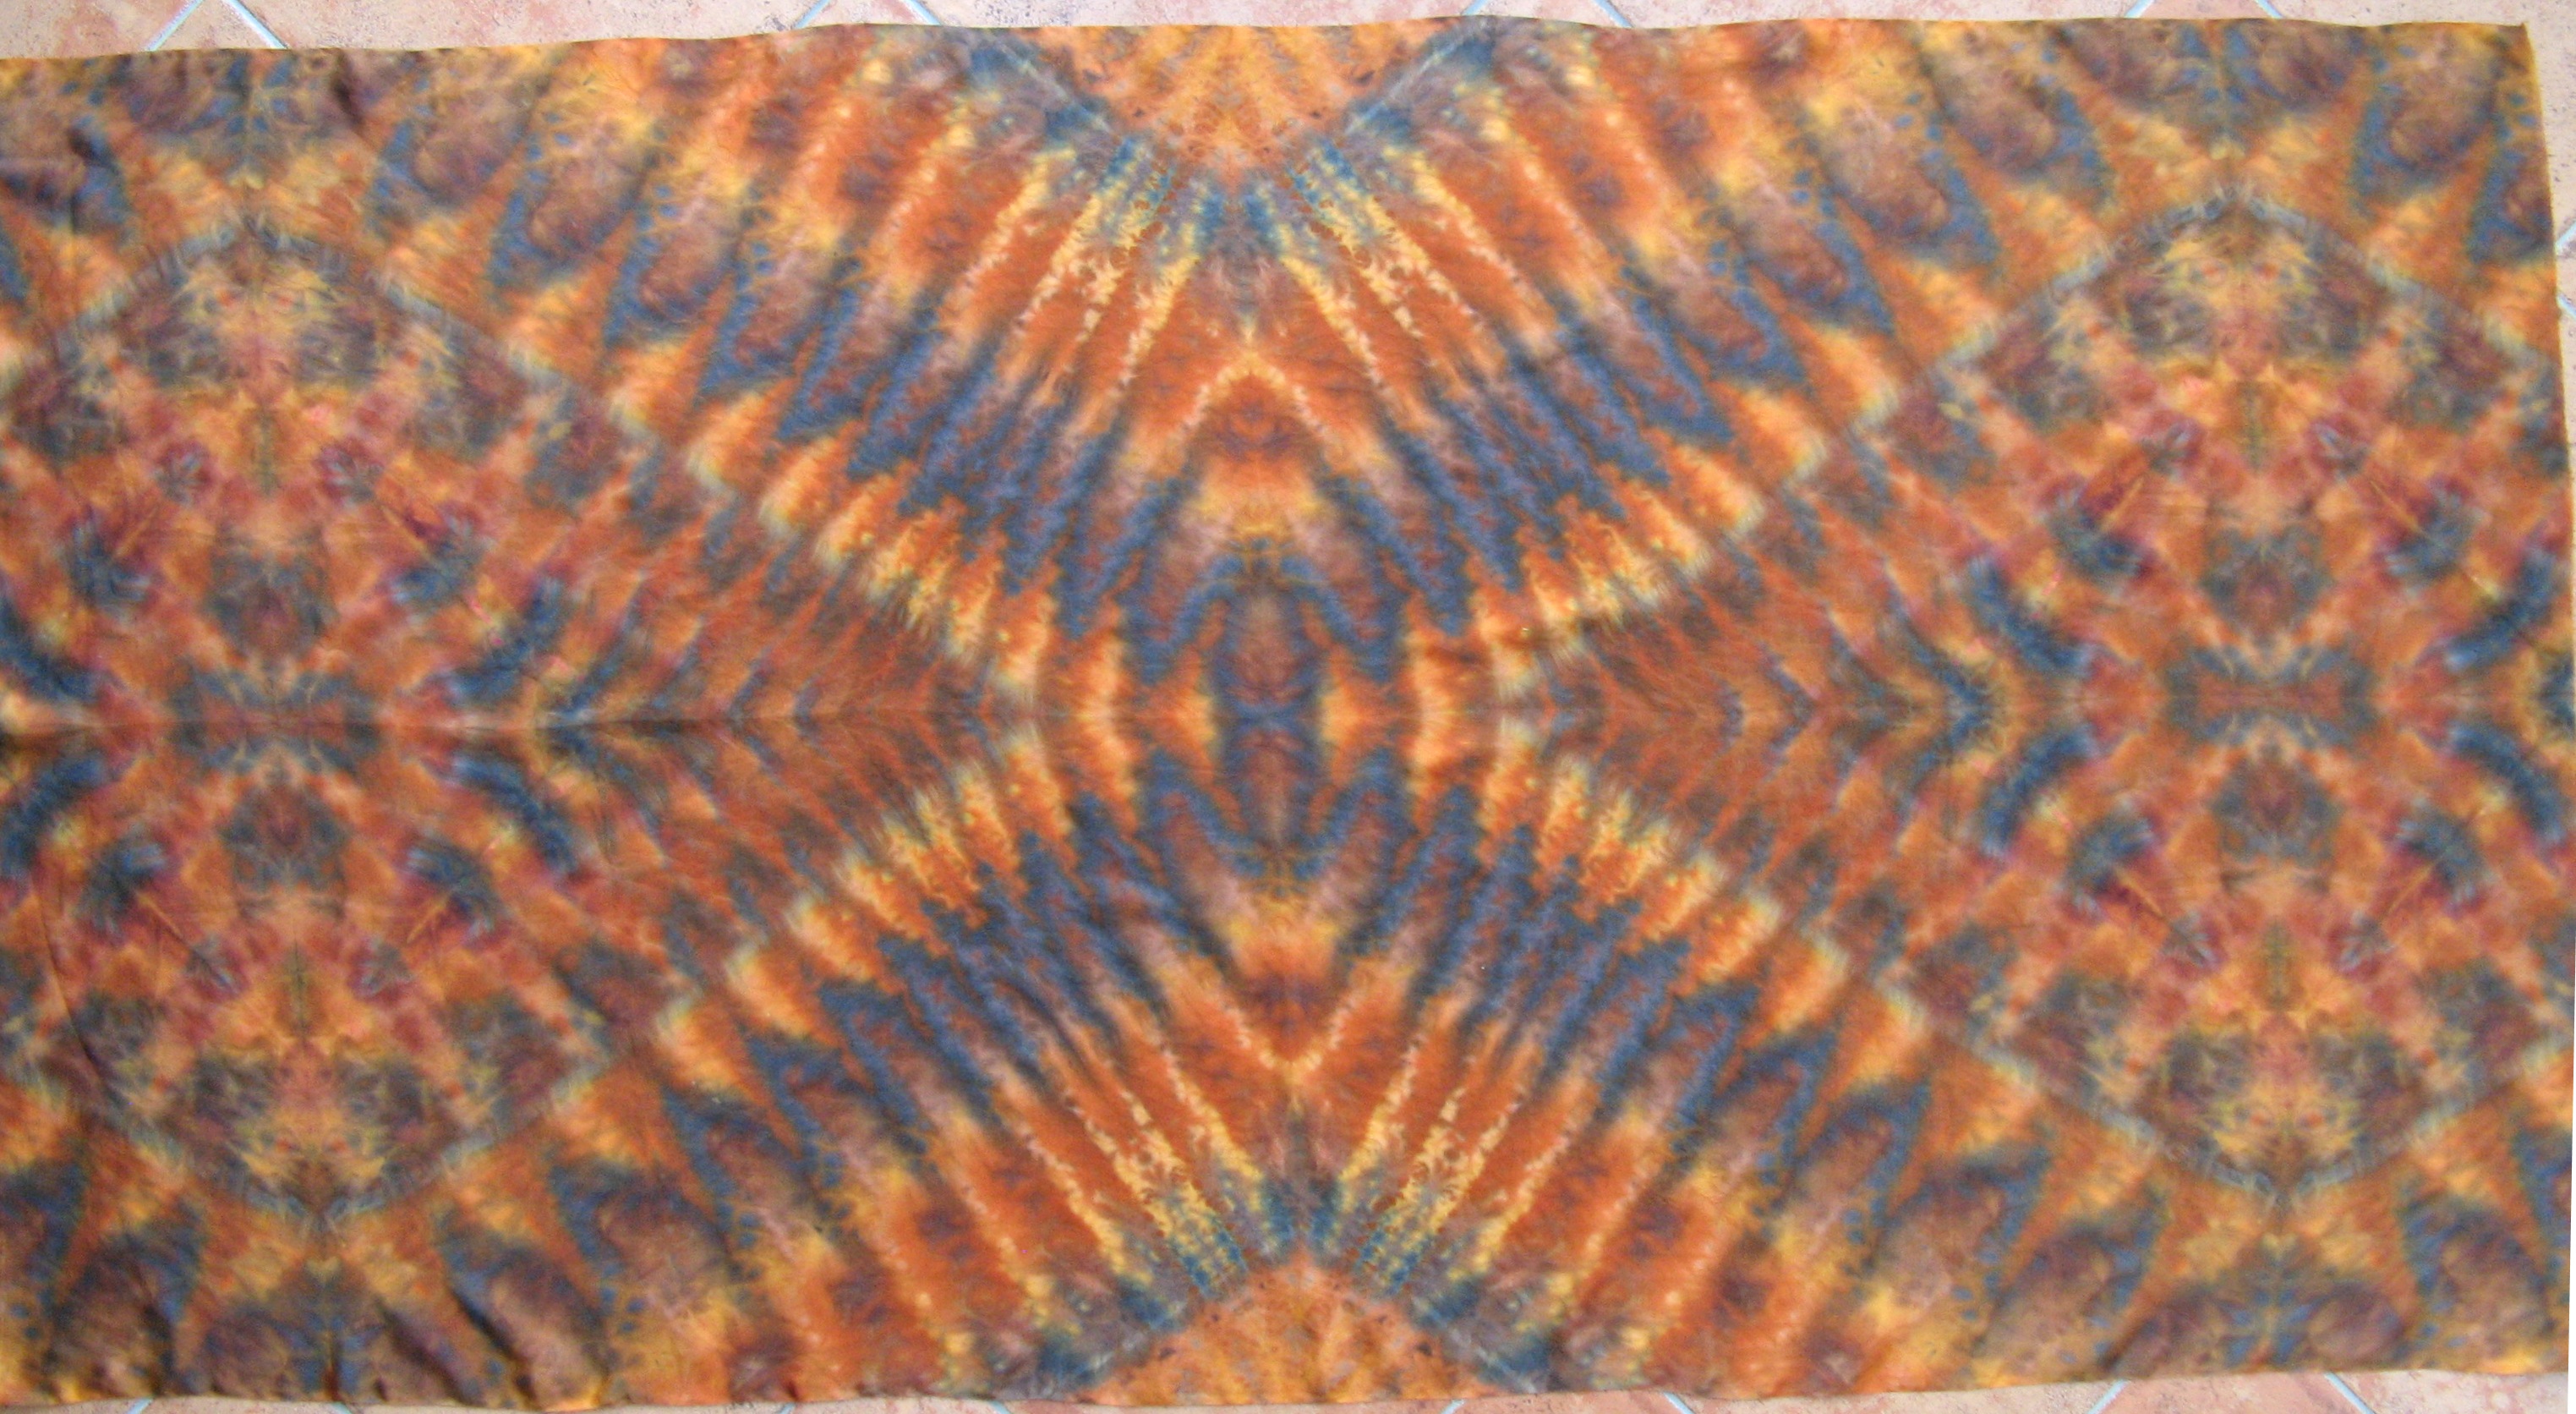
Four "agate" silk shibori pieces. 37 and 40 are 45"x 45"; 38 and 39 are W 36" x L 72". 37 is basic agate technique.
No attempt has been made to use the binding to give agate-type banding, as is the case in the others. However, in
contrast to the softness of the abstractly-distributed colour, there is a single bound motif near one corner.
41.
 42.
42.
41 is variation on mokume (woodgrain) shibori, an adaptation of an exercise set as homework (pre-course preparation) for his
students by Bryan of Japanese Textile Workshops in 2012. 42 is a 45" x 45" scarf piece of an exercise employing two shibori
techniques - yamamichi (mountain path) and variations on kumo. Originally the exercise I set was on a piece W 15" x L 45", ideal
for a quick exercise. The kumo were smaller as a consequence - bai (shells), hence my name for it: Mountain Path with Shells
(yamamichi with bai). I came to use some of the possible variations in folding and binding the bai or kumo as a way of teaching
how to alter its shape. As this began life as a class demonstration, the "shells" in 42 are therefore all differently shaped.
Return to Artworks
or go to Machine Embroidery
or go to Character Cloth Dolls